The secret to stunning aurora photos isn’t expensive gear; it’s mastering a precise manual workflow that overrides your camera’s flawed instincts in the dark.
- Your camera’s “Auto” mode is fundamentally blind to the low-light conditions of the aurora and will consistently produce blurry, poorly exposed images.
- Success depends on a three-part technical mastery: deliberate light harvesting with manual settings, achieving perfect focus on the stars, and protecting your gear from the extreme Canadian cold.
Recommendation: Before your trip, practice the “infinity focus” trick during the day and memorize the battery rotation system to make these technical steps second nature in the field.
Standing under a sky alive with dancing green ribbons is a breathtaking experience. For an amateur photographer, that awe is often mixed with a deep-seated anxiety: “Will my photos do this justice, or will I just go home with a memory card full of black, blurry rectangles?” You’ve likely heard the common advice—use a tripod, get a wide-angle lens, and dress warmly. While true, this advice barely scratches the surface and won’t save you from the most common pitfalls of aurora photography.
The fundamental challenge is that your modern, sophisticated camera is not designed to operate in near-total darkness. Its automated systems, which serve you so well in daylight, will actively work against you under the stars. The autofocus will hunt endlessly, the flash might pop uselessly, and the exposure will be completely wrong. Even if you use a recent smartphone with a night mode, you are ceding control at the most critical moment. True success in capturing the northern lights lies not in hoping your camera figures it out, but in taking complete, methodical control.
This guide moves beyond the platitudes. It provides a technical, detail-oriented workflow specifically for the amateur photographer traveling to the Canadian north. We’re going to break down the exact manual process for ‘light harvesting,’ the foolproof tricks for achieving sharp focus in the dark, and the critical strategies for keeping your equipment functioning in temperatures that can plummet to -30°C. This isn’t about buying more gear; it’s about mastering a process that turns the fear of failure into a predictable plan for creating images you’ll be proud of.
This article provides a structured approach to ensure you are technically and mentally prepared for your aurora-chasing adventure. The following sections will guide you through each critical step, from foundational camera settings to advanced composition and cultural awareness.
Summary: Capturing the Aurora: A Beginner’s Guide to Night Photography
- Why Auto Mode Will Ruin Your Northern Lights Photos
- How to Keep Your Camera Battery from Dying in -30°C Weather
- The “Infinity Focus” Trick: How to Get Sharp Stars Every Time
- Why You Need Trees or Mountains to Make Your Aurora Photo Pop
- Solar Ham vs. My Aurora Forecast: Which App Actually Works?
- The Mental Health Benefits of Stargazing in Jasper’s Dark Sky Preserve
- Why Is the Aurora Usually Green (and When Can You See Red)?
- The Spirits in the Sky: Indigenous Legends of the Northern Lights
Why Auto Mode Will Ruin Your Northern Lights Photos
The single biggest mistake a beginner can make is trusting their camera’s “Auto” mode. In the profound darkness of a Canadian winter night, your camera’s automated systems are flying blind. The autofocus will hunt back and forth, unable to lock onto the faint stars, resulting in a blurry mess. The camera’s meter, trying to find enough light to create a standard exposure, will likely either deploy the on-camera flash—useless for a subject kilometers away—or set an exposure that is wildly incorrect. It is simply not programmed for this highly specialized environment.
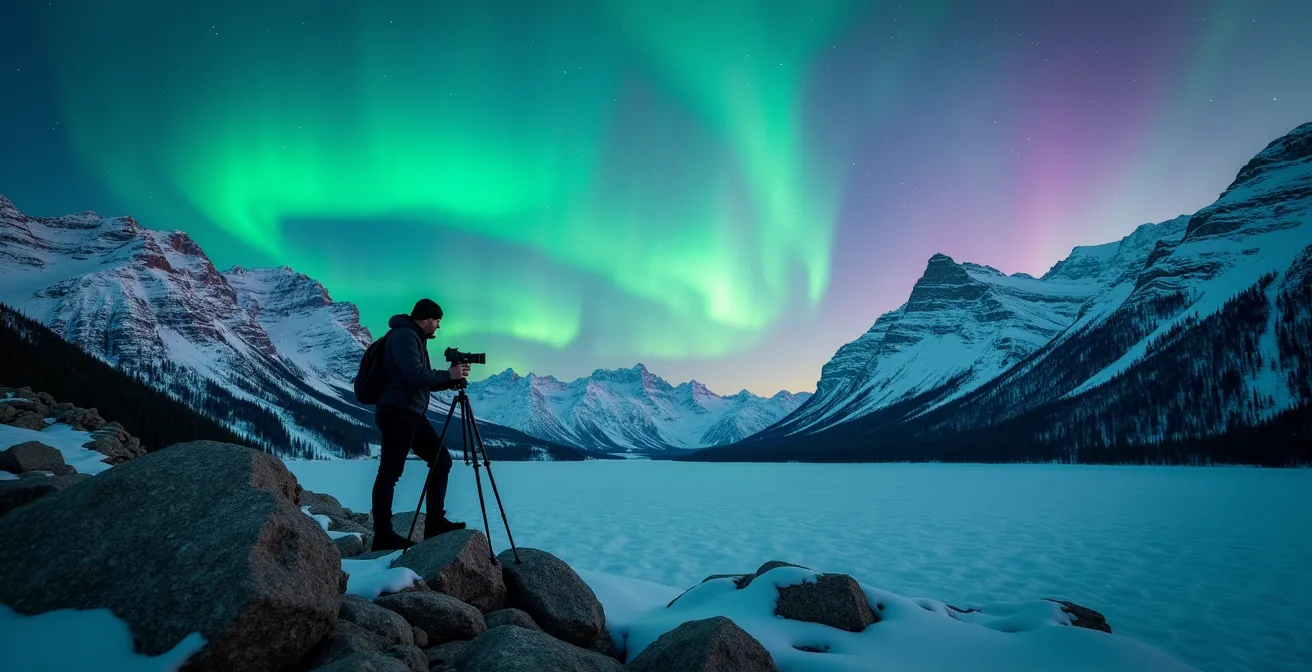
To succeed, you must take full control through Manual Mode (M). This isn’t just a suggestion; it’s a requirement. Manual mode allows you to orchestrate the three pillars of exposure—aperture, ISO, and shutter speed—to perform an act of “light harvesting.” Your goal is to hold the camera’s shutter open just long enough to gather the faint, ethereal light of the aurora without blurring its movement. This is a delicate balance that no automated system can achieve.
As the image above illustrates, the difference is stark. Where auto mode fails, a deliberate manual approach succeeds. Professional guidelines suggest starting with a wide aperture (like f/2.8 or lower), a high ISO, and a variable shutter speed. For a vibrant, fast-moving aurora, you might use a 1-12 second shutter speed, while a fainter display might require longer. According to professional aurora photography guidelines, a common starting point is an ISO between 3200-8000 with a wide aperture and a shutter speed tailored to the aurora’s brightness and speed. This level of granular control is the foundation of every successful aurora photograph.
How to Keep Your Camera Battery from Dying in -30°C Weather
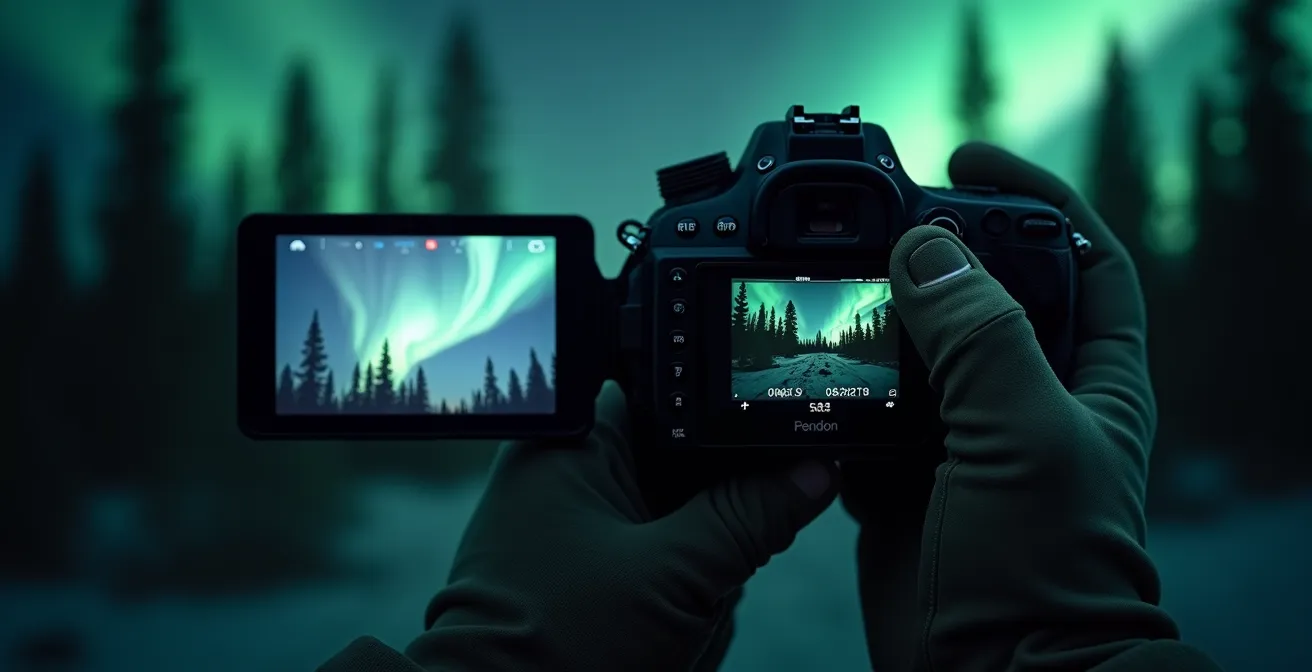
Your second greatest enemy in the Canadian north, after darkness, is the biting cold. Lithium-ion batteries, the power source for virtually all modern cameras, despise low temperatures. As the temperature drops, the chemical reactions inside the battery slow down, drastically reducing its ability to supply power. A battery that shows a 100% charge indoors can die within minutes when exposed to -30°C. This isn’t a possibility; it’s a certainty if you are unprepared.
The experience of a photographer in Yellowknife, Canada, serves as a stark warning. During the most intense aurora display of their trip, at -35°C, their camera froze and died completely, despite carrying multiple spares. This highlights a critical lesson: simply bringing extra batteries is not enough. You must actively manage their temperature. This process can be thought of as battery triage—a constant, active system to keep your power sources alive.
The most effective method, used by seasoned Canadian photographers, is the “Parka Pocket System.” It’s a simple but non-negotiable workflow for rotating batteries from the cold camera to the warmth of your body. This ensures you always have a warm, ready-to-go power source, preventing a catastrophic failure at the peak of the celestial show. The goal is to treat your batteries like a vital resource that needs constant protection from the elements.
Action Plan: The Canadian Parka Pocket System
- Body Warmth Storage: Keep at least 2-3 fully charged spare lithium-ion batteries in an inner jacket pocket, close to your body, to maintain their temperature.
- Moisture Protection: Store each warm spare battery in a small, sealed ziplock bag to prevent condensation when you transfer it to the cold camera.
- Systematic Rotation: Actively swap the battery from your camera with a warm one from your pocket every 20-30 minutes, regardless of the power level shown.
- External Heat Source: In truly extreme cold (-30°C and below), use chemical hand warmers secured to the camera body with rubber bands, especially near the battery compartment.
- Slow Acclimatization: Never bring a frigid camera directly into a warm cabin. Place it in your camera bag and let it acclimatize slowly for an hour to prevent damaging internal condensation.
The “Infinity Focus” Trick: How to Get Sharp Stars Every Time
After conquering manual mode and the cold, the next hurdle is focus. In the dark, your lens’s autofocus system is useless. It will “hunt” back and forth, searching for contrast that doesn’t exist, and will never lock onto the faint point of light that is a distant star. The result of relying on autofocus is almost always a soft, blurry image. The solution is to switch your lens to Manual Focus (MF) and set it to infinity (∞).
However, the infinity marking on most modern lenses is not perfectly accurate. Simply turning the ring to the ∞ symbol will often result in slightly soft stars. The key is to find the *true* infinity point for your specific lens. This is best done not in the dark, but during the day. This technique of “predictive focusing” saves you from fumbling with cold fingers and trying to judge sharpness on a tiny LCD screen at night.
The process is simple: before you head out, use autofocus to focus on the most distant object you can see—a far-off mountain, a cloud, or a tree on the horizon. Once the camera confirms focus, carefully switch the lens from “AF” to “MF”. Your lens is now perfectly set to infinity. The final, crucial step is to use a small piece of gaffer tape to lock the focus ring in place. This prevents you from accidentally bumping it in the dark. If you must adjust at night, use your camera’s Live View mode, digitally magnify a bright star or planet, and manually adjust the focus ring until that point of light is as small and sharp as possible.
Night photography, aurora or just the starry sky, for me is a lot of trial and error. The focus at a 1.8 aperture can also be super tricky to get perfect, and without the ability to auto focus, it can take a few tries to get it right.
– ZenSeekers Photographers, ZenSeekers
Why You Need Trees or Mountains to Make Your Aurora Photo Pop
A photo of the aurora in an empty sky can be beautiful, but it often lacks scale, depth, and a sense of place. The most compelling aurora images are not just about the sky; they are about the relationship between the sky and the land. A foreground anchor—a silhouette of a mountain range, a line of snow-covered pines, a rustic cabin, or even a human figure—transforms a simple snapshot into a powerful landscape photograph.
This foreground element serves several critical functions. First, it provides a sense of scale, showing the immense size of the auroral display relative to the world below. Second, it creates depth, leading the viewer’s eye from the immediate foreground into the distant sky. Finally, it grounds the image in a specific location, telling a story about where you were when you witnessed this spectacle. A photo with the iconic peaks of the Canadian Rockies is instantly more powerful than an anonymous patch of sky.
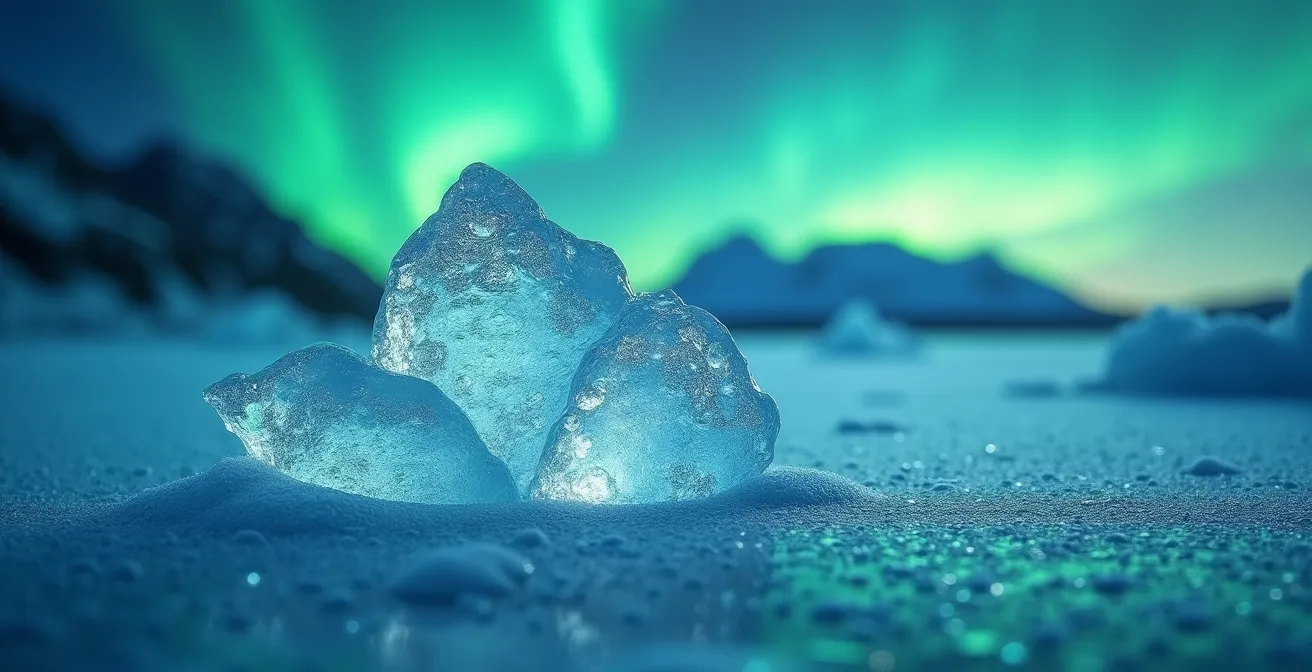
The best way to incorporate a foreground is to scout your locations during the daylight hours. Look for compelling shapes, leading lines, and interesting silhouettes. An especially powerful technique in Canada is to use reflections. A partially frozen lake or a calm river can mirror the aurora, doubling its visual impact and filling the frame with light and color. Photographers in the Canadian Rockies have achieved stunning results by using the illuminated blue ice of cave formations at Athabasca Glacier as a dramatic foreground, or the frozen methane bubbles of Abraham Lake to create texture against the soft glow of the aurora.
Solar Ham vs. My Aurora Forecast: Which App Actually Works?
Once you’ve mastered your camera, the next challenge is knowing when to point it at the sky. A host of apps and websites promise to predict aurora activity, but their effectiveness varies wildly. Many beginners rely solely on the Kp-index, a scale from 0 to 9 that measures geomagnetic disruption. However, as professional aurora photographer Greg Sheard points out, the Kp-index is often a lagging indicator, with data delayed by up to three hours. A powerful, localized substorm can erupt and fade in minutes, long before the Kp-index reflects it.
A more effective strategy for aurora chasing in Canada involves a multi-tool approach, combining real-time data with community-based observations. While apps like My Aurora Forecast are excellent for user-friendly alerts on your phone, they should be supplemented with more direct data sources. For photographers in Canada, the two most reliable resources are often the government’s own space weather service and local community groups.
The following table compares some of the most common tools, highlighting their strengths for Canadian aurora hunters. The key takeaway is that no single app is a magic bullet. The most successful chasers cross-reference professional-grade data from sources like NOAA and Space Weather Canada with the “ground-truth” reports from local observers who are seeing the aurora with their own eyes.
This comparative data, based on an analysis of common forecasting tools, shows why a layered approach is superior.
| Tool | Real-time Data | Canadian Coverage | Reliability |
|---|---|---|---|
| Space Weather Canada (CSA) | Yes – Primary source | Excellent | Most authoritative for Canada |
| Alberta Aurora Chasers (Facebook) | Community reports | Western Canada focus | Ground-truth verification |
| NOAA Space Weather | 30-minute forecast | Good | Professional grade |
| My Aurora Forecast App | Location alerts | Good | User-friendly |
The Mental Health Benefits of Stargazing in Jasper’s Dark Sky Preserve
While the technical pursuit of the perfect aurora photo can be all-consuming, it’s essential to remember the experience itself. The process of night photography, especially in a pristine environment like Jasper’s Dark Sky Preserve, offers profound mental health benefits that go far beyond capturing an image. The slow, deliberate nature of the “manual workflow”—adjusting focus, composing the shot, waiting for the long exposure to finish—forces a state of mindfulness.
In a world of constant digital distraction, this process creates a mandatory disconnect. In many prime viewing locations within Jasper National Park, cell service is limited or non-existent. This lack of connectivity, combined with the quiet focus required for photography, fosters a deep sense of presence. You are not scrolling through a feed; you are engaged in a patient dialogue with the night sky. This meditative state, of being fully present with the natural world, is a powerful antidote to modern stress and anxiety.
Photographers visiting the preserve often report this as an unexpected but deeply rewarding aspect of their trip. The goal shifts from simply “getting the shot” to participating in a timeless ritual of watching the cosmos. The camera becomes a tool not just for capturing light, but for focusing attention. The quiet hum of the universe takes precedence over the noise of daily life, creating a sense of calm, perspective, and awe that lingers long after the camera is packed away.
Why Is the Aurora Usually Green (and When Can You See Red)?
The vibrant green of the aurora is its most iconic color, but it’s not the only hue in the celestial palette. The colors you see—and photograph—are a direct result of atmospheric chemistry. The spectacle begins when charged particles from the sun strike gases in Earth’s upper atmosphere. The specific color emitted depends entirely on which gas is being excited and at what altitude.
The dominant green color comes from interactions with oxygen atoms at altitudes of about 100 to 300 kilometers. This is the most common auroral light because of the high concentration of oxygen at that layer of the atmosphere. On rare occasions, during particularly intense geomagnetic storms, these solar particles have enough energy to excite oxygen atoms at much higher altitudes (above 300 km). At these heights, the oxygen emits a deep, ruby-red light. Because this red light is fainter and occurs higher up, it is often visible only during the most powerful storms. For viewers in more southerly parts of Canada, like southern Alberta or Ontario, they may only see the high-altitude red tops of a massive storm happening further north on the horizon.
Finally, NASA explains that nitrogen molecules, when struck, produce the blue and purplish-pink colors you sometimes see along the lower edge of an auroral curtain. Because our eyes are less sensitive to these colors and camera sensors are more sensitive to red, your final photograph might reveal a more complex and colorful display than you could perceive in the moment. Capturing these rarer colors requires a slight adjustment in technique:
- Increase Sensitivity: For faint red auroras, you may need to increase your camera’s ISO or use a longer shutter speed to gather enough light.
- Sensor Advantage: Remember that your camera sensor is often more sensitive to deep reds than the human eye, so check your LCD screen for colors you might not be seeing.
- White Balance: Don’t be afraid to adjust the white balance in post-processing to more accurately render the true colors of the display you witnessed.
Key Takeaways
- Mastering a manual camera workflow is the only reliable way to capture sharp, well-exposed aurora images.
- Composition is critical; use foreground elements like trees and mountains to give your photos scale and a sense of place.
- Proactive gear management, especially battery triage in the cold, is a technical skill as important as your camera settings.
The Spirits in the Sky: Indigenous Legends of the Northern Lights
Photographing the northern lights in Canada is more than a technical exercise; it’s an opportunity to connect with a phenomenon that holds deep cultural significance for the Indigenous peoples who have inhabited these lands for millennia. Before they were explained by science, the aurora were woven into the fabric of cosmology and storytelling. Viewing them with an awareness of this context adds a profound layer of respect and meaning to the experience.
For the Cree, the lights are the “wâwâhtew,” the dance of the spirits. For the Inuit, they are the “Aqsarniit,” the path of souls playing a game in the sky. These are not just quaint stories; they are expressions of a deep, living relationship with the land and sky. As a visitor and photographer on these lands, engaging with this heritage is a vital part of responsible tourism. One of the most direct ways to do this is by supporting Indigenous-owned businesses. Local Indigenous guides, particularly in hubs like Yellowknife, combine ancestral knowledge of weather and sky patterns with modern forecasting, offering a uniquely holistic experience.
Engaging with this culture enriches your journey, transforming it from a simple photo trip into a more meaningful cultural exchange. It reframes the aurora not just as a beautiful subject, but as a living, breathing part of a heritage that long predates the invention of the camera. By learning a few words, seeking out Indigenous guides, and asking for permission before photographing on designated territories, you move from being a mere tourist to a respectful guest.
With these technical skills and a mindset of respect, you are now equipped to go out and capture the magic of the aurora, creating images that are not only beautiful but also mindful of the land and stories they represent.
Frequently Asked Questions on The Spirits in the Sky: Indigenous Legends of the Northern Lights
What Indigenous names exist for the aurora in Canada?
The Cree call it ‘wâwâhtew’ meaning Dance of the Spirits, while the Inuit term ‘Aqsarniit’ translates to The Path or The Trail.
How can photographers support Indigenous communities?
Book tours with Indigenous-owned operators like North Star Adventures in Yellowknife to ensure tourism dollars support the community directly.
What protocols should be followed on First Nations territories?
Always ask for permission before photographing on designated territories and be mindful that some locations may be sacred or have specific protocols.