In summary:
- Your Icefields Parkway trip is a logistical expedition, not just a scenic drive. Success depends on strategic planning.
- Fuel, food, and offline maps are non-negotiable preparations to be made in Lake Louise or Jasper. There are virtually no services for 232km.
- Weather is unpredictable. Sudden snow can occur even in summer, and road closures are possible. Always check 511 Alberta before you depart.
- Wildlife encounters, especially “bear jams,” require patience and strict safety protocols. Never exit your vehicle to photograph a bear.
- Prioritizing a few key stops is better than rushing to see everything. Understand the trade-offs between crowd levels, accessibility, and photo opportunities.
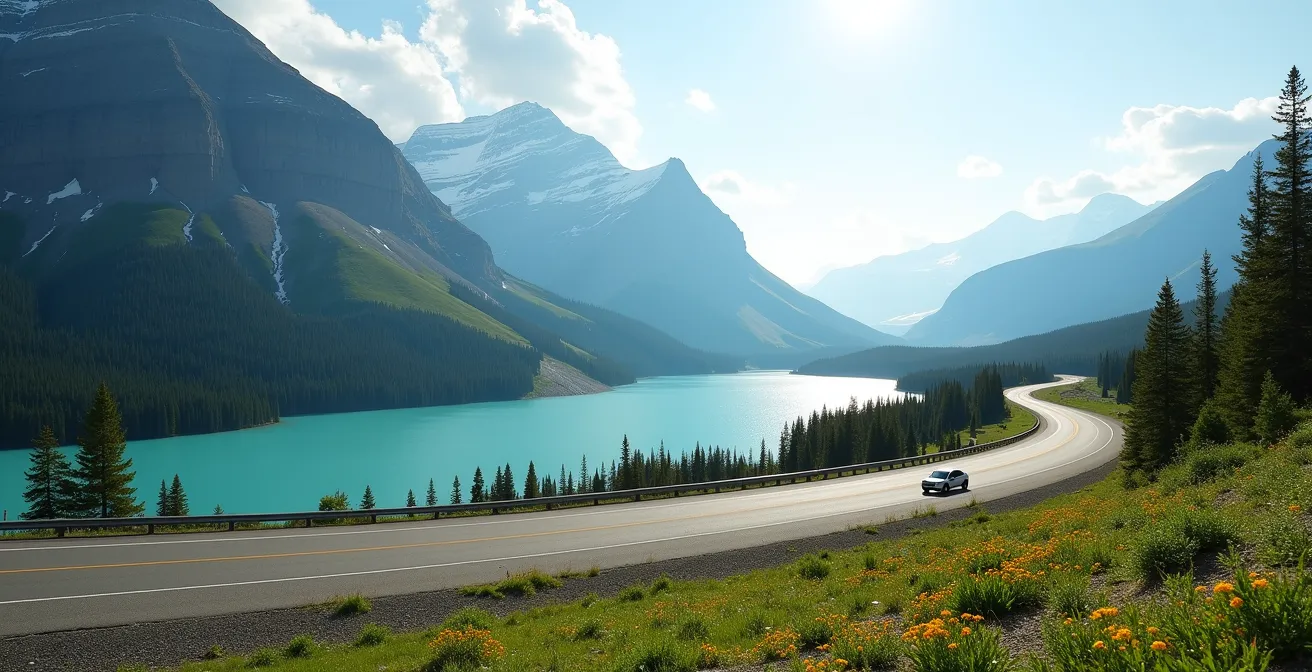
The Icefields Parkway is consistently named one of the most spectacular road trips on Earth. A ribbon of asphalt carving through the heart of the Canadian Rockies, it connects the iconic towns of Banff and Jasper over 232 kilometers of raw, untamed wilderness. For any road tripper, the drive is a bucket-list item, a journey past dozens of ancient glaciers, turquoise lakes, and jagged peaks. The photos are epic, the promise of adventure palpable.
But most guides focus only on the highlights, presenting the drive as a simple checklist of beautiful viewpoints. They’ll show you a photo of Peyto Lake and tell you to stop there. What they often fail to convey is a crucial truth: a successful trip on Highway 93 is a matter of strategic logistics. The beauty is a given, but your experience will be defined by the decisions you make long before you see your first glacier. This road operates by its own set of rules, and respecting them is the key to a safe and unforgettable journey.
This is not a guide that simply lists every possible stop. Instead, this is a strategic manual. We will move beyond the “what” and focus on the “why” and “how.” We’ll treat this drive as the expedition it truly is, focusing on the critical decision points that separate a stressful, rushed trip from a smooth, awe-inspiring adventure. From calculating real costs to handling sudden mountain weather, mastering these choices is the real secret to conquering the Icefields Parkway.
To help you plan this incredible journey, we have broken down the most important considerations into eight key strategic areas. This structure will guide you through every critical decision, from pre-trip planning in your home city to split-second choices on the road.
Table of Contents: Driving the Icefields Parkway
- Why You Must Fill Up Your Tank in Lake Louise Before Leaving
- Is the $100+ CAD Snowcoach Tour on the Athabasca Glacier Worth It?
- Peyto Lake vs. Bow Lake: Where to Stop for the Best Photo?
- How to Handle Sudden Snowstorms on the Parkway in September
- The Danger of “Bear Jams” on Highway 93 and How to Avoid Them
- Domestic Flights vs. Rental Cars: Calculating the Real Cost of Crossing Canada
- Why Lake Louise Looks Grey at 6 AM and Blue at Noon
- Reaching Rocky Mountain Summits: Preparation for Every Skill Level
Why You Must Fill Up Your Tank in Lake Louise Before Leaving
Your Icefields Parkway journey doesn’t begin with a stunning vista; it begins with a mundane but absolutely critical task at a gas station. The single most important strategic decision you’ll make is to start with a full tank of gas. The 232-kilometer stretch between Jasper and Lake Louise is famously devoid of services. There is only one gas station along the entire route: Saskatchewan River Crossing. While it serves as a potential lifeline, relying on it is a strategic error.
Located 80 km from Lake Louise, this station is known for having significantly higher fuel prices due to its remote location. As a traveler, you’re a captive audience, and the pricing reflects that. Worse, its operating hours are seasonal and it can close without notice during the shoulder seasons or winter months. Assuming it will be open and available is a gamble you don’t want to take. The same logic applies to food and cash; stock up in Lake Louise or Jasper to avoid overpriced and limited options. Remember, there are no cell service and no ATMs along the vast majority of the parkway.
Your Pre-Departure Checklist for Lake Louise
- Fuel Up: Fill your tank completely at the Petro-Canada or Husky on Village Road. Do not leave with less than a full tank.
- Stock Supplies: Purchase groceries, water, and snacks to last the entire day. This avoids expensive and often crowded lodge food.
- Withdraw Cash: If you plan on any small purchases, get cash in the village. There are no bank machines until you reach Jasper.
- Acquire Bear Spray: This is an essential piece of safety equipment. Purchase it from an outdoor store like Wilson Mountain Sports.
- Download Maps: Your phone’s GPS will not work. Download offline maps of the entire region on Google Maps or a similar app.
Treating Lake Louise as your final, fully-stocked basecamp is the first step to a stress-free drive. This preparation ensures your focus remains on the breathtaking scenery, not on your dwindling fuel gauge.
Is the $100+ CAD Snowcoach Tour on the Athabasca Glacier Worth It?
The Columbia Icefield is the heart of the parkway and its star attraction, the Athabasca Glacier, presents a major decision point for travelers: how should you experience it? The most heavily marketed option is the Brewster Snowcoach Tour, a massive all-terrain vehicle that drives you directly onto the surface of the glacier. With prices exceeding $100 CAD per person, the question of its value is a significant one, especially for families or budget-conscious travelers.
The “worth” of the tour depends entirely on your travel style, physical ability, and budget. It offers unparalleled accessibility, allowing those with mobility issues, young children, or seniors to set foot on a glacier—an experience that would otherwise be impossible. However, the 80-minute tour is a structured, high-volume tourist experience. For those seeking adventure and a more intimate connection with the environment, there are compelling alternatives that offer a greater return on time and money.
The choice between the Snowcoach, a guided icewalk, or a simple trail walk is a classic example of a strategic trade-off on the Parkway. The following table breaks down the options to help you decide.
| Experience | Cost (CAD) | Duration | Best For | Physical Requirements |
|---|---|---|---|---|
| Brewster Snowcoach Tour | $100+ | 80 minutes | Families, seniors, mobility issues | Minimal – vehicle access |
| Athabasca Glacier Icewalk | $85-95 | 3-5 hours | Adventure seekers, photographers | Moderate fitness required |
| Self-guided Toe of Glacier Trail | Free with park pass | 1-2 hours | Budget travelers, quick visits | Easy walking ability |
Ultimately, if your goal is simply to say you’ve been on a glacier and accessibility is your top priority, the Snowcoach delivers. If you crave a genuine wilderness experience and are physically able, the guided icewalk offers far more value and a deeper sense of accomplishment.
Peyto Lake vs. Bow Lake: Where to Stop for the Best Photo?
Among the sea of turquoise lakes along the Icefields Parkway, two stops consistently create a photographer’s dilemma: Peyto Lake and Bow Lake. Both are stunning, but with limited time, you may need to choose where to invest your energy for that perfect shot. The answer depends on what you value most: an iconic, elevated vista or classic, accessible mountain reflections.
Peyto Lake is world-famous for its unique wolf-head shape and intense, milky-turquoise color, viewed from a high overlook. This is its greatest strength and its primary weakness. The elevated perspective is breathtaking, but it means you’re far from the water, making classic reflection shots impossible. Furthermore, its fame means the viewing platform is often packed with tour buses, requiring patience to get an unobstructed view after a 20-minute uphill walk from the main parking lot.
Bow Lake, on the other hand, offers immediate gratification. It’s visible right from the highway, with a large parking area providing direct access to the shoreline. This is the spot for capturing mirror-like reflections of the surrounding peaks in the calm waters of the early morning. It’s generally less crowded than Peyto, allowing for more creative freedom and a peaceful experience. While it may not have Peyto’s unique shape, it epitomizes the classic Canadian Rockies lake scene.
To help you make the right strategic choice for your itinerary, consider this photographer’s scorecard.
| Criteria | Peyto Lake | Bow Lake |
|---|---|---|
| Morning Light (6-9 AM) | 4/5 – Great color saturation | 5/5 – Perfect reflections before wind |
| Crowd Factor | 2/5 – Very busy, tour buses | 4/5 – Less crowded, more space |
| Accessibility from Car | 3/5 – 20-min uphill walk required | 5/5 – Visible from parking area |
| Reflection Potential | 1/5 – Too high above lake | 5/5 – Lake level access |
| Unique Features | 5/5 – Wolf-head shape iconic | 3/5 – Classic mountain lake |
The verdict? For the iconic, must-have shot and if you don’t mind a walk and crowds, prioritize Peyto Lake. For serene morning reflections and easy access, Bow Lake is the superior choice.
How to Handle Sudden Snowstorms on the Parkway in September
While the Icefields Parkway is a dream drive in summer, venturing here in the shoulder season—especially September—introduces a significant risk factor: snow. In the high altitudes of the Rockies, weather is fickle and can change in an instant. A sunny morning in Banff can turn into a whiteout blizzard at Bow Summit. Being prepared for this possibility is not just advisable; it’s a critical component of risk management.
The official guidance is clear: Parks Canada officially warns that snow can be expected at any time of year, and this is especially true from September onwards. When a storm hits, road conditions can deteriorate rapidly, with visibility dropping to near zero and ice forming on the pavement. With no cell service, you are on your own. It’s essential to understand that if you are not a confident winter driver, you should reconsider a self-drive trip during periods of adverse weather.
From October 1st to April 1st, winter tires or snow chains are legally required on Highway 93. Even in September, if your rental car is equipped with all-season tires, you must be prepared to turn back or wait out the storm. Before you leave, your first and last action should be to check the official road report.
Key Actions for Monitoring Road Conditions:
- Check the 511 Alberta website or call 511 (within Alberta) for real-time road status updates before departure.
- Understand the status codes. A “Travel Not Recommended” warning is a serious advisory for even experienced drivers.
- Monitor the live webcams available on the 511 site to see actual conditions at key points like the Columbia Icefield.
- Respect all road closures. If a gate is down, do not attempt to bypass it. You will be stranded without help.
- Pay special attention to the weather forecast for the Columbia Icefield area, as its high elevation means it often has completely different weather than Lake Louise or Jasper.
Encountering a sudden snowstorm can be a terrifying experience if you’re unprepared. By taking these proactive steps, you transform a potential crisis into a manageable situation, ensuring your safety above all else.
The Danger of “Bear Jams” on Highway 93 and How to Avoid Them
One of the most thrilling prospects of driving the Icefields Parkway is the chance to see wildlife, particularly grizzly and black bears. However, this excitement often leads to one of the road’s most significant and preventable dangers: the “bear jam.” A bear jam occurs when a driver spots a bear on the roadside and abruptly stops, causing a chain reaction of braking cars, traffic chaos, and a hazardous situation for both humans and the animal.
These impromptu traffic jams are dangerous for several reasons. They can cause rear-end collisions as drivers focus on the wildlife instead of the road. More importantly, they encourage unsafe behavior. People often get out of their cars to get a closer photo, forgetting they are in the presence of a powerful, unpredictable wild animal. This habituates bears to humans and vehicles, which can lead to them being relocated or even destroyed.
As the experts at The Planet D Travel Guide state, respecting wildlife is paramount. In their guide to the parkway, they offer this crucial advice:
Both black bears and grizzly bears live in this region. They are more commonly seen in the spring and early summer, often on the roadside eating the fresh green vegetation. Remember to keep a safe distance, never feed them, and do not get out of your car to take photos.
– The Planet D Travel Guide, Wildlife Safety on the Icefields Parkway
If you spot a bear, the correct and safest action is to slow down, assess the traffic situation, and if it is safe to do so, pull over completely off the pavement. Stay in your vehicle. The minimum safe viewing distance is 100 meters—roughly the length of three buses. Use a zoom lens. If you cannot stop safely or if a crowd has already formed, your best move is to keep driving. Your fleeting photo is not worth endangering yourself, other drivers, or the bear.
Domestic Flights vs. Rental Cars: Calculating the Real Cost of Crossing Canada
For most Canadians living outside of Alberta, the first strategic decision for an Icefields Parkway trip happens long before you see the mountains: how do you get there? The choice between driving your own car from a province like Ontario or British Columbia versus flying into Calgary (YYC) or Edmonton (YEG) and renting a vehicle has significant implications for both your budget and your timeline.
Driving from a city like Toronto is an epic road trip in itself, offering ultimate flexibility but at the cost of at least 35+ hours of driving each way. While you save on rental fees, you must factor in the cost of gas, multiple overnight stays, and vehicle wear and tear. Flying is much faster but introduces its own complexities: flight costs, airport fees, and the price of a rental car. Calgary is the more popular gateway, offering a shorter drive to the parkway, while Edmonton can sometimes offer cheaper flights and a less tourist-heavy route to Jasper.
When calculating rental costs, don’t forget the Parks Canada entry fee. A day pass is an option, but for any trip longer than a few days, the smart financial move is to purchase a Parks Discovery Pass. For about $139 for a family/group, it provides unlimited access to all national parks for a full year, representing excellent value.
This table provides a rough cost analysis for a traveler starting from Toronto to illustrate the financial trade-offs.
| Option | Total Cost (CAD) | Travel Time | Pros | Cons |
|---|---|---|---|---|
| Fly to Calgary + Rental | $800-1200 | 6-7 hours total | Fastest option, fresh for driving | Airport fees, limited by flight schedules |
| Fly to Edmonton + Rental | $750-1100 | 7-8 hours total | Often cheaper flights, less tourist traffic | Longer drive to parkway start |
| Drive from Toronto | $600-800 (gas only) | 35+ hours driving | Complete flexibility, no rental fees | Vehicle wear, multiple overnight stops needed |
| One-way Calgary-Jasper rental | $400-600 + drop fee | N/A | No backtracking required | High one-way fees ($200+), fly from different city |
For most people outside of neighboring provinces, flying into Calgary and renting a car offers the best balance of time and cost, allowing you to arrive refreshed and ready for the main event: the drive itself.
Why Lake Louise Looks Grey at 6 AM and Blue at Noon
Many travelers arrive at the iconic Lake Louise at sunrise, hoping to capture its world-famous turquoise hue, only to be met with a view that is surprisingly… grey. This common experience highlights a critical strategic element for mountain photography: understanding how light interacts with glacial lakes. The magical color is not a constant; it’s a performance that depends on the sun’s position in the sky.
The vibrant blue-green color of lakes like Louise, Moraine, and Peyto is caused by “rock flour”—fine-grained particles of silt suspended in the water, a result of glacial erosion. These particles reflect and scatter sunlight. When the sun is low on the horizon, like at sunrise or sunset, or when the sky is heavily overcast, there isn’t enough direct, powerful light hitting the water to create the brilliant color. The lake appears as a muted, often greyish-blue.
The magic happens when the sun is high overhead. As photographers consistently report, the optimal viewing time is between 10 AM and 2 PM for maximum color saturation. During these hours, the direct sunlight penetrates the water and reflects off the suspended rock flour, producing the intense, glowing turquoise that makes these lakes famous. This phenomenon is also seasonal. As Parks Canada notes, “Lakes melt into blue-green hues by late June”, once the spring melt has deposited a fresh supply of rock flour. So, if your primary goal is to see that postcard color, a mid-day visit is strategically better than a dawn patrol, even if it means dealing with larger crowds.
This doesn’t mean sunrise is a bad time to visit. It’s often the calmest time for capturing stunning reflections of the surrounding mountains, like the Victoria Glacier at Lake Louise. The strategic choice is to decide your priority: are you after the most vibrant color or the most dramatic reflections? For color, aim for mid-day. For reflections, brave the early morning chill.
Key Takeaways
- Plan Like an Expedition: Your first stop is the grocery store and gas station in Lake Louise or Jasper. A full tank and ample supplies are non-negotiable.
- Weather is the Boss: Mountain weather is unpredictable. Always check 511 Alberta for road conditions and be prepared for snow, even in September. Your itinerary must be flexible.
- Respect the Wildlife: A “bear jam” is a sign of danger, not a photo-op. The safest action is often to keep driving slowly. Never, ever get out of your car to approach a wild animal.
Reaching Rocky Mountain Summits: Preparation for Every Skill Level
The Icefields Parkway isn’t just a scenic drive; it’s a gateway to some of the most rewarding hikes in the Canadian Rockies. For many, the ultimate goal is to stand on a summit and gaze out at the sea of peaks. However, it’s crucial to match your ambition with your ability. The mountains demand respect, and choosing the right trail is a key strategic decision for a safe and enjoyable day.
A critical consideration for many visitors, especially those flying in from sea-level cities like Toronto or Vancouver, is altitude acclimatization. Bow Summit, the highest point on the parkway, sits at 2,088 m (6,800 ft). Attempting a strenuous, high-elevation hike on your first day can lead to altitude sickness, characterized by headaches and nausea. A smart strategy is to spend your first day or two doing easier, lower-elevation activities to allow your body to adjust before tackling a major ascent.
The parkway offers incredible options for every fitness level, from gentle valley walks to challenging summit scrambles. Here are three iconic hikes, categorized by difficulty, that showcase the range of experiences available:
- Easy – Parker Ridge Trail: This is arguably the best “bang for your buck” hike on the parkway. A 2.2km one-way trail with a moderate 250m elevation gain leads you to a breathtaking, panoramic view of the Saskatchewan Glacier. It’s a 2-hour investment for a world-class reward.
- Moderate – Wilcox Pass: A 4km one-way trail gaining 335m, this hike takes you through beautiful alpine meadows often frequented by bighorn sheep. It offers stunning, elevated views of the Athabasca Glacier and surrounding icefields. Allow about 4 hours for the return trip.
- Challenging – Paget Peak (via Sherbrooke Lake): For those seeking a true summit experience, this 7.5km one-way trail with 600m of elevation gain delivers. It’s a demanding 5-6 hour hike that rewards determined hikers with an incredible 360-degree view.
No matter which hike you choose, essential gear is a must: layered clothing for changing weather, a minimum of 2 liters of water per person, and, most importantly, bear spray carried in an accessible location. Always check Parks Canada trail reports for conditions and closures before you go.
Now that you’re armed with the strategies for fuel, stops, and safety, the final step is to apply this knowledge to build your own perfect, flexible itinerary. A successful Icefields Parkway road trip isn’t about rigidly following a pre-set plan; it’s about making informed, smart decisions on the fly. Start by prioritizing your must-see sights and activities, and then build a loose timeline that allows for spontaneous stops and potential delays from weather or wildlife. Embrace the spirit of adventure, and the parkway will reward you with an experience that goes far beyond the photographs.