The dramatic cliffs of Atlantic Canada are not solid ground; the greatest danger isn’t falling off, but the ground falling away from under you.
- Coastal erosion is often invisible, creating “false edges” of turf that can collapse without warning.
- Hyper-local maritime weather can cause temperatures to plummet by over 15°C in minutes due to extreme wind chill.
Recommendation: Your safety depends on understanding and respecting these invisible forces, not just packing the right gear or following generic advice.
The magnetic pull of a rugged Atlantic coastline is undeniable. For hikers and photographers, the edge of a Newfoundland or Nova Scotia cliff is a place of profound beauty, where the sheer power of the ocean meets the unyielding strength of ancient rock. The urge to get just a little closer, to capture that perfect, heart-stopping photo of the waves crashing below, is a powerful one. Many arrive armed with what they believe is common sense: check the weather, wear good boots, and don’t get too close to the edge. While this advice is not wrong, it is dangerously incomplete.
As a safety officer who has spent years watching over these majestic and treacherous landscapes, I can tell you the real risks are not the ones you can easily see. The true danger lies in the invisible forces at play: the slow, relentless work of geological erosion that creates deceptive traps underfoot, and the volatile, hyper-local maritime weather that can transform a pleasant hike into a survival situation in mere minutes. This is a landscape that demands more than caution; it demands a deep understanding and a healthy dose of respect for its raw, untamable power.
This guide is designed to go beyond the platitudes. It’s built to give you the mindset of an experienced coastal explorer by explaining the ‘why’ behind the safety rules. We will deconstruct the specific dangers of these coastlines, from unstable ground and hurricane-force gusts to the disorienting power of sea fog. By the end, you won’t just be a tourist with a camera; you’ll be an informed visitor, capable of making smart decisions that allow you to witness the awe-inspiring beauty of Atlantic Canada and return safely with your stories and photos.
This article will provide you with the critical knowledge needed to navigate this environment. From understanding the geological risks to dressing for survival and planning your time effectively, this is your official briefing on coastal safety.
Summary: A Park Officer’s Guide to Coastal Safety in Atlantic Canada
- Why Standing on the Edge of Atlantic Cliffs Is Deadlier Than It Looks
- Windbreakers vs. Softshells: Dressing for 80km/h Coastal Gusts
- Cape Breton vs. Gros Morne: Which Cliffs Offer the Best Views for Non-Hikers?
- How to Predict “Fog Days” Before Driving to Cape Spear
- The Timing Mistake That Leaves Hikers in the Dark on Coastal Trails
- How to Use Atlantic Fog to Create Moody Coastal Photos
- Why You Need a “4-Season” Wardrobe for a 1-Week Atlantic Trip
- Road Tripping the Atlantic Provinces: Ferries, Bridges, and Timing
Why Standing on the Edge of Atlantic Cliffs Is Deadlier Than It Looks
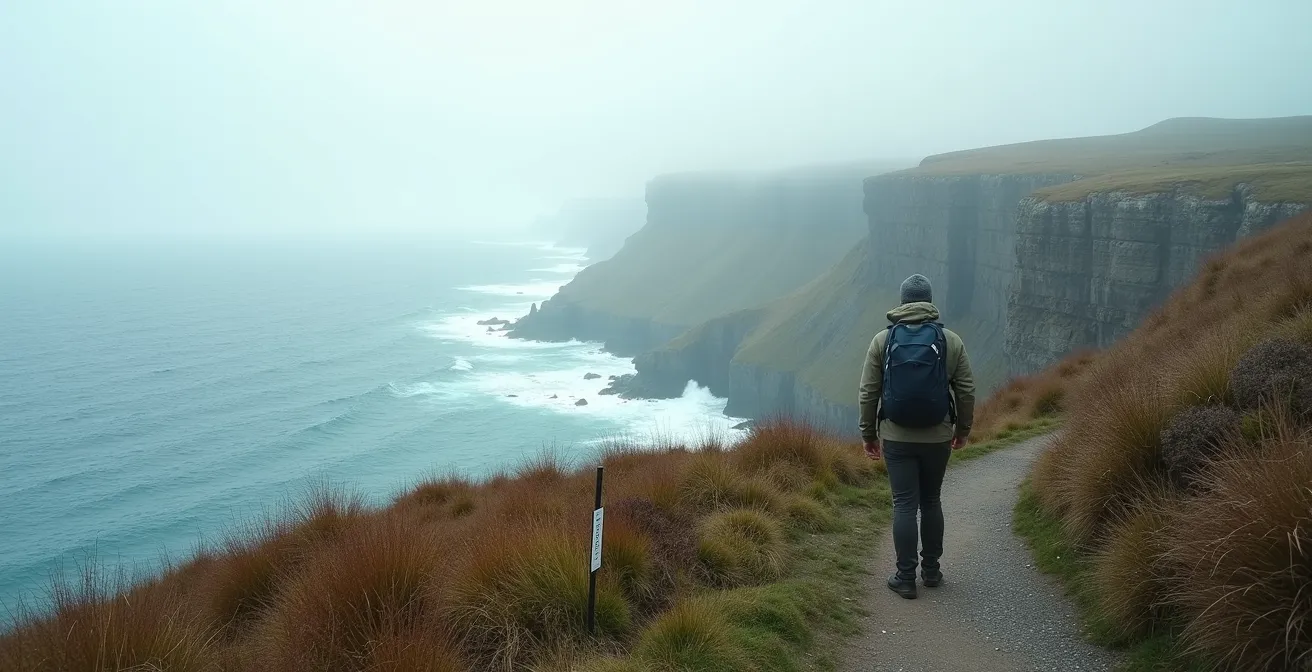
The most common misconception about our coastal cliffs is that they are solid rock. What appears to be a stable, grassy verge extending over the ocean is often a deadly illusion. This is what we call a “false edge.” The relentless action of waves, ice, and rain erodes the cliff face from below, carving out cavities. The ground you’re standing on may only be a thin layer of turf and soil with nothing but air beneath it. It can, and does, collapse without any warning. There is no sound, no tremor—just a sudden, catastrophic failure.
This process of undercut erosion is the single most insidious danger on trails like Newfoundland’s East Coast Trail. You cannot assess its stability by sight or by stamping your foot. The only safe assumption is that any ground within several metres of a visible cliff edge is compromised. This is why official trail markers, like the black and white waymarker posts on rocky sections, are placed well back from the true edge. They aren’t just suggestions; they are calculated safety lines based on an understanding of the underlying geology that a visitor cannot possibly have.
Respecting this invisible danger is paramount. We see footprints in the mud right at the precipice and know it’s only a matter of time before tragedy strikes. Maintaining a safe distance isn’t about being overly cautious; it’s about acknowledging a fundamental and unforgiving law of coastal physics. Your desire for a better view or a photo is not worth the finality of a fall caused by collapsing ground.
This is why following all trail signage is not just a rule, but a life-saving practice rooted in a deep understanding of the landscape’s instability.
Windbreakers vs. Softshells: Dressing for 80km/h Coastal Gusts
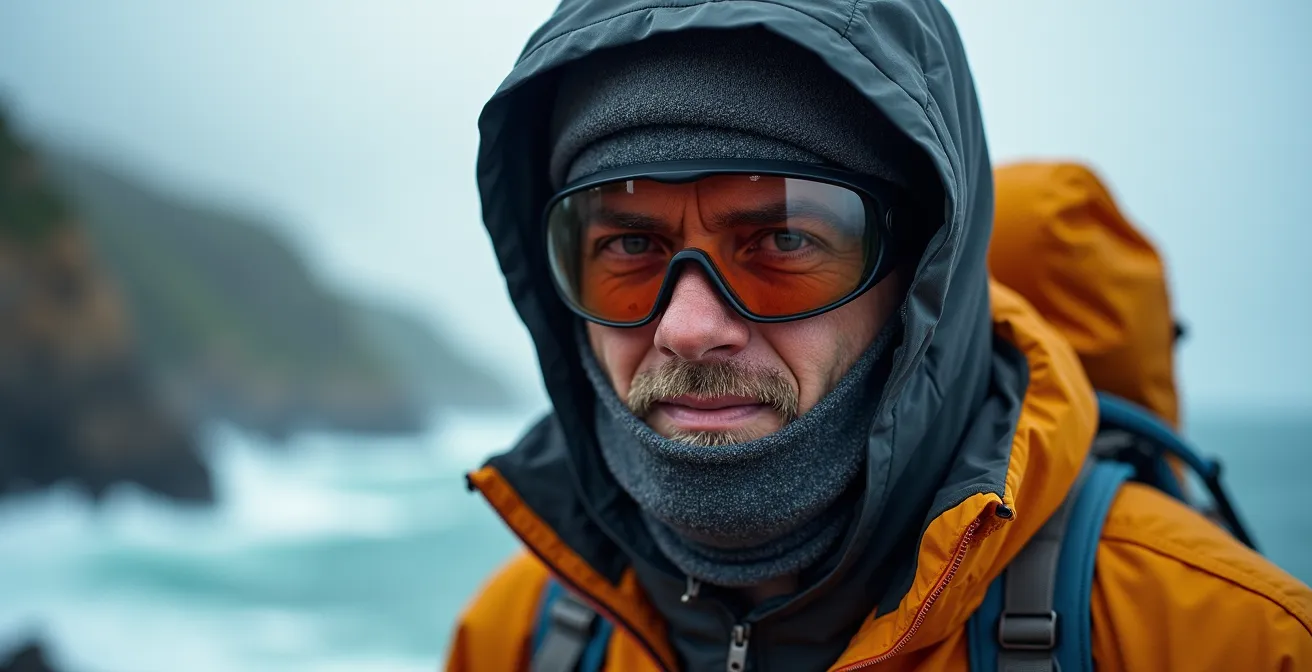
On the Atlantic coast, the wind is not just a breeze; it is a physical force. Gusts frequently reach 80km/h or more, especially on exposed headlands. This isn’t just uncomfortable; it’s a primary driver of hypothermia, even on a day that feels mild. The mistake many visitors make is underestimating the wind chill factor. A simple windbreaker might stop some of the wind, but it does little to prevent the rapid convective heat loss that chills you to the bone. A softshell offers more insulation but can be overwhelmed by the combination of wind and salt spray.
This is why experienced locals and safety personnel rely on a hardshell jacket. A hardshell is a fully waterproof and windproof outer layer designed to create a complete barrier against the elements. It’s your personal storm shelter. When paired with insulating mid-layers (like fleece or down), it traps your body heat effectively, creating a pocket of warm air that the wind cannot penetrate. The hood of a quality hardshell is crucial—it should be adjustable to cinch tightly around your face, protecting your head and neck, where a significant amount of body heat is lost.
The chart below illustrates just how dramatically the wind impacts the temperature you actually feel. As you can see, a pleasant 10°C day can feel like -5°C, pushing you into a moderate risk for hypothermia if you’re not properly protected.
| Actual Temperature | Feels Like with 80km/h Wind | Hypothermia Risk Level |
|---|---|---|
| 15°C | 2°C | Low |
| 10°C | -5°C | Moderate |
| 5°C | -12°C | High |
| 0°C | -19°C | Extreme |
Choosing a hardshell over a simple windbreaker isn’t an upgrade; on the Atlantic coast, it’s a fundamental requirement for staying safe and warm.
Cape Breton vs. Gros Morne: Which Cliffs Offer the Best Views for Non-Hikers?
The breathtaking cliffside vistas of Atlantic Canada are not exclusively reserved for intrepid hikers. For those with mobility challenges, families with small children, or visitors who simply prefer a view without a strenuous trek, both Nova Scotia’s Cape Breton Highlands and Newfoundland’s Gros Morne National Park offer spectacular and accessible options. The key is knowing where to go, as the two parks offer different experiences in accessibility.
Cape Breton Highlands National Park is arguably the gold standard for accessible viewpoints. It has been designed with the road-tripper in mind. In fact, 100% of Cape Breton Highlands National Park’s viewpoints on the Cabot Trail are wheelchair accessible, featuring wide, paved areas right off the main road. The famous Skyline Trail even has a wheelchair-accessible viewing platform ramp, and MacKenzie Mountain boasts three accessible decks with interpretive panels. This makes it an ideal choice for anyone wanting guaranteed, world-class views with minimal physical effort.
Gros Morne National Park, while equally stunning, often requires a bit more effort to reach its prime lookouts. The park’s character is wilder, and while there are many roadside stops, some of the most iconic cliff views are at the end of unpaved or moderately difficult trails. For instance, the main Tablelands trail is only partially accessible, with some uneven terrain. However, the park is continuously improving, and like Cape Breton, it offers accessible washrooms and picnic areas at major sites, ensuring a comfortable visit.
Accessibility Checklist: Key Viewpoints
- Cape Breton’s Skyline Trail: Check for the fully paved pathway and wheelchair-accessible ramp leading to the main viewing platform.
- MacKenzie Mountain (Cape Breton): Visit the three distinct wheelchair-accessible viewing decks, each offering a different perspective.
- Gros Morne’s Tablelands Trail: Assess the initial section, which is generally flatter, but be prepared for uneven ground further on.
- Freshwater Lake (Cape Breton): Utilize the 0.5 km fully accessible boardwalk loop, complete with protective bumpers.
- Facilities Check: Confirm the location of accessible washrooms and picnic areas at major viewpoints in both parks before you go.
Ultimately, Cape Breton is the superior choice for guaranteed, effortless cliffside views, while Gros Morne offers a wilder feel that may require more careful planning for those with mobility concerns.
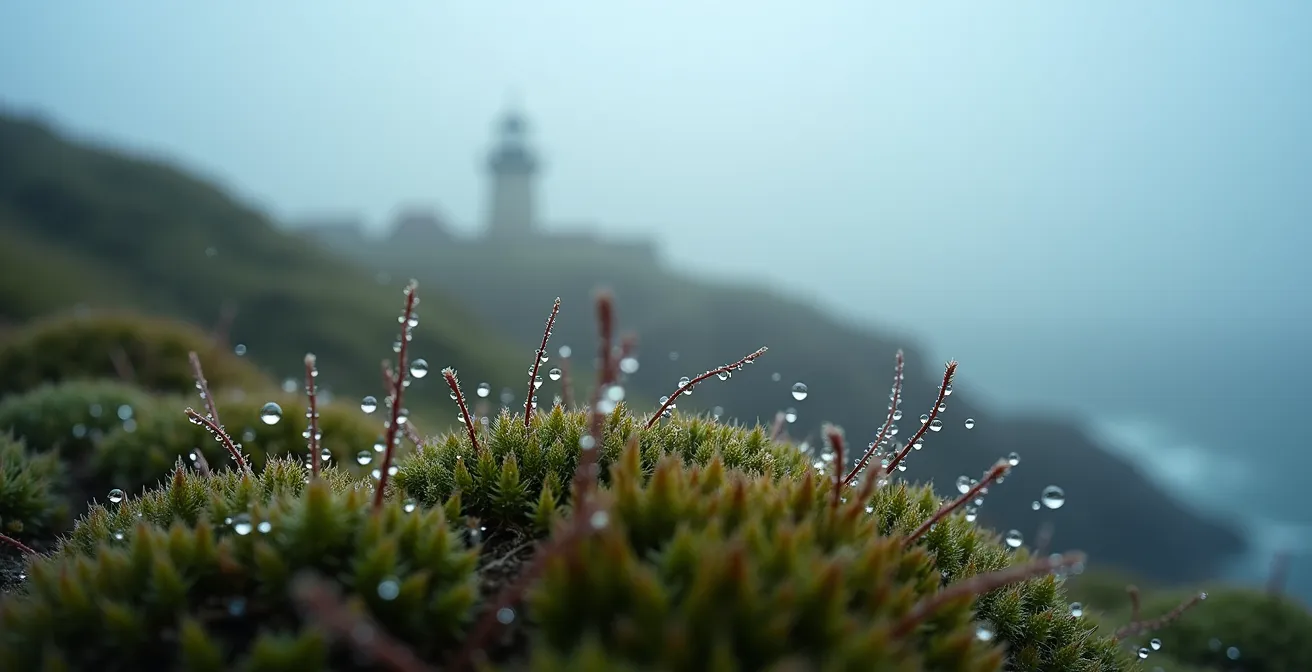
How to Predict “Fog Days” Before Driving to Cape Spear
There is little more disappointing than driving to a famous coastal viewpoint like Cape Spear—the most easterly point in North America—only to be met with a wall of white. Atlantic sea fog, known locally as “the vapour,” is thick, disorienting, and can reduce visibility to near zero. Standard weather apps are often useless for predicting it because fog is a hyper-local marine phenomenon. It forms when warm, moist air from the south or southeast drifts over the cold Labrador Current. The key to predicting a “fog day” is to stop thinking like a land-dweller and start checking the weather like a mariner.
Your best tool is Environment Canada’s marine forecast, not your phone’s default weather app. Marine forecasts provide specific information on visibility that is critical for sailors and, by extension, for coastal sightseers. Look for key phrases like “fog patches” or “fog banks developing.” Critically, official fog warnings indicate visibility less than 1 mile, a clear signal that your scenic drive will likely end in a white-out. Another crucial clue is the wind direction; a persistent wind from the south or southeast is a strong indicator that fog is being pushed inland from the ocean.
Before you even get in the car, take a few minutes to check these specialized forecasts. By monitoring both the specific mentions of fog and the tell-tale wind direction, you can dramatically increase your chances of arriving at Cape Spear on a day with the crystal-clear, panoramic views you came for. Don’t let the fog catch you by surprise; learn to see it coming.
This simple habit of checking the right forecast can be the difference between a breathtaking memory and a deeply frustrating travel day.
The Timing Mistake That Leaves Hikers in the Dark on Coastal Trails
One of the most common and dangerous errors hikers make on coastal trails is a simple miscalculation of time. They look at a map, see a 10km trail, and think, “That’s a two-hour walk.” On the rugged, undulating terrain of the East Coast Trail, that assumption can leave you stranded in the dark, miles from your car, transforming a pleasant afternoon into a potential search and rescue operation. The terrain is relentlessly up-and-down, often boggy, and the stunning views encourage frequent, time-consuming stops.
Furthermore, sunset times can be deceptive. In the deep, narrow coves and bays characteristic of the coastline, the sun can disappear behind a ridge a full 90 minutes or more before the official sunset time. What you thought was ample daylight vanishes, and you’re suddenly navigating treacherous, rocky paths in near-total darkness. This isn’t a rare occurrence; it’s a predictable trap for the unprepared.
Case Study: The Cost of a Timing Error
This scenario is all too real. In a recent incident, an experienced hiker reported overdue on the East Coast Trail was located by searchers at 2:00 AM. They had misjudged their timing and were forced to make an emergency camp. While the outcome was positive, it triggered a significant response from the St. John’s Rovers Search and Rescue, demonstrating how a simple timing mistake quickly escalates, diverting critical emergency resources.
To avoid this, you must use a planning formula adjusted for local conditions. A modified version of Naismith’s Rule, a standard hiking time calculator, is essential for planning any hike on the Atlantic coast.
Your Action Plan: Calculating True Atlantic Trail Time
- Baseline Time: Allow 1 hour for every 4 kilometres of trail distance.
- Elevation Factor: Add an additional 30 minutes for every 300 metres of elevation gain shown on the trail map.
- Bog Factor: For notoriously wet trails like many sections of the East Coast Trail, add a 20% buffer to your total time.
- Early Darkness Factor: Find the official sunset time for the day and subtract 90 minutes to get your “safe finish” time.
- Buffer Time: Add a final buffer for weather changes, photo stops, and breaks. Never plan a hike that finishes close to your “safe finish” time.
By planning conservatively and respecting the terrain and early twilight, you ensure your adventure ends with a warm meal, not a cold night waiting for rescue.
How to Use Atlantic Fog to Create Moody Coastal Photos
While fog can be a frustration for sightseers, for photographers, it’s a creative gift. The thick, rolling fog banks of Newfoundland and Nova Scotia can transform a familiar landscape into an ethereal, mysterious scene. It simplifies complex backgrounds, isolates subjects, and adds a palpable mood and atmosphere to an image that bright sunlight simply cannot match. The key is to shift your mindset from capturing grand vistas to focusing on intimate details and compelling compositions.
When shooting in fog, your technique needs to adapt. Your camera’s light meter will often be fooled by the bright white of the fog, leading to underexposed, “muddy” grey images. A good starting point is to overexpose your shot by +1 to +1.5 stops to render the fog as a clean white or light grey. Using a tripod is also essential, not just for stability in lower light, but for your own personal safety, allowing you to plant yourself in a secure spot. The corrosive salt in sea fog is also tough on gear, so a weather-sealed camera and a good lens cloth are your best friends.
However, the most important rule of fog photography has nothing to do with camera settings. The desire to capture a dramatic shot can create a dangerous “tunnel vision.” As the official East Coast Trail guidelines wisely state, you must always practice the:
One Hand for the Camera, One for Canada Rule
– East Coast Trail Safety Guidelines, East Coast Trail Association Hiking Etiquette
This means always maintaining a secure handhold or stable footing, bracing yourself against solid rock before you even think about framing your shot. Never back up towards a cliff edge for a better composition. Instead, use safe, accessible elements as your foreground, like the colourful fishing stages of Petty Harbour or a lone, windswept tree, letting the fog create a sense of mystery and depth behind them.
By prioritizing safety, you can harness the fog’s creative potential to capture truly unique and evocative images of Atlantic Canada.
Why You Need a ‘4-Season’ Wardrobe for a 1-Week Atlantic Trip
Packing for a one-week trip to Atlantic Canada in summer feels like it should be simple: shorts, t-shirts, maybe a light jacket. This is a critical mistake. The region is a convergence of powerful weather systems and ocean currents, creating a series of volatile microclimates. You can genuinely experience the weather of all four seasons in a single day, or even in a single drive. It might be warm and sunny on a sheltered PEI beach, while just a few hundred kilometres away in St. John’s, a cold, windy fog has dropped the temperature by 15 degrees.
This is why a “4-season” layering system is not an exaggeration; it’s a practical necessity. Your wardrobe must be adaptable. The core of this system includes a base layer (like merino wool, which insulates even when damp), a mid-layer for warmth (like a fleece or light insulated jacket), and a waterproof/windproof hardshell. With these three pieces, you can add or remove layers to adapt to anything from a warm, sunny afternoon to a sudden, freezing downpour.
The table below gives a snapshot of the varied conditions you can expect and the essential gear required for each. Notice how no single outfit would be appropriate for all four locations.
| Location | Typical Conditions | Essential Gear |
|---|---|---|
| PEI Beaches | Warm, sunny, sandy | Sun hat, light layers, swimwear |
| Halifax | Variable, sudden rain | Rain jacket, waterproof footwear |
| Bay of Fundy | Cool breezes, tidal changes | Fleece, windbreaker |
| St. John’s | Windy, fog, cool evenings | Insulated jacket, waterproof shell |
Forget packing outfits; pack a versatile system of layers. It’s the only way to stay comfortable and safe as you move through the ever-changing weather of the Atlantic provinces.
Key takeaways
- The ground at a cliff’s edge is often an illusion; “false edges” created by erosion can collapse without warning.
- Maritime wind chill is extreme. An 80km/h gust can make a 10°C day feel like -5°C, creating a serious risk of hypothermia.
- Accurate time planning is critical. Use a modified formula (factoring in elevation, terrain, and early twilight) to avoid being caught in the dark.
Road Tripping the Atlantic Provinces: Ferries, Bridges, and Timing
A successful road trip through the Atlantic provinces is a masterclass in logistics. Unlike a drive across the prairies, this region is a puzzle of islands, peninsulas, ferries, and bridges, all governed by the schedules of tides and reservations. Simply showing up and expecting to get a spot on a ferry to Newfoundland in July is a recipe for a long, frustrating wait. With the East Coast Trail alone seeing over 14,000 visitors completing over 65,000 hikes annually, the infrastructure is busy.
Booking your major crossings and accommodations well in advance is absolutely critical, especially for summer travel. The Marine Atlantic ferries to Newfoundland are the most crucial booking; they often sell out 6-8 months in advance for peak season. A smart strategy is to book an “open-jaw” route—arriving in Argentia (near St. John’s) and departing from Port aux Basques on the west coast—to save you more than 10 hours of backtracking across the island.
This principle of advance planning extends beyond ferries. Popular national park campsites, like those in Fundy National Park, are often booked solid on the very day Parks Canada opens reservations in January. Even daily activities require forethought. To experience the famous ocean floor walk at Hopewell Rocks in New Brunswick, you must consult the tide charts and plan to arrive at least two hours before low tide. A spontaneous approach to an Atlantic Canada road trip will lead to missed opportunities and wasted time. A well-planned itinerary is your ticket to a seamless adventure.
Start planning your Atlantic adventure not just by the map, but by the ferry schedules and the tide charts. This foresight is the final piece of the safety puzzle, ensuring your journey is as smooth and enjoyable as it is breathtaking.
Frequently Asked Questions on Atlantic Canada Travel
Why is merino wool recommended for Atlantic Canada travel?
Merino wool offers temperature regulation, moisture-wicking, and odor-resistance – perfect for days that swing from cold and damp mornings to warm sunny afternoons typical of maritime climates.
What’s the ‘Ferry & Car’ wardrobe system?
Keep a ‘go-bag’ with one of each essential layer (rain shell, fleece, hat, gloves) in your car’s passenger area to avoid unpacking luggage during sudden weather changes on ferries or scenic stops.
Where can I buy quality emergency gear locally?
Trusted outfitters include ‘The Outfitters’ in St. John’s and MEC in Halifax for quality weather gear rather than tourist shop alternatives.