Getting the iconic Moraine Lake photo doesn’t require a $160/hour rental canoe; it’s a solvable logistical puzzle.
- You can legally bring a compact, airline-compliant inflatable kayak on the mandatory Parks Canada shuttle.
- Understanding the science of light and “rock flour” is the key to capturing the water at its most vibrant turquoise.
Recommendation: Prioritize a packable kayak and master the transport logistics. This approach unlocks ultimate creative freedom and delivers massive savings for the perfect water-level shot.
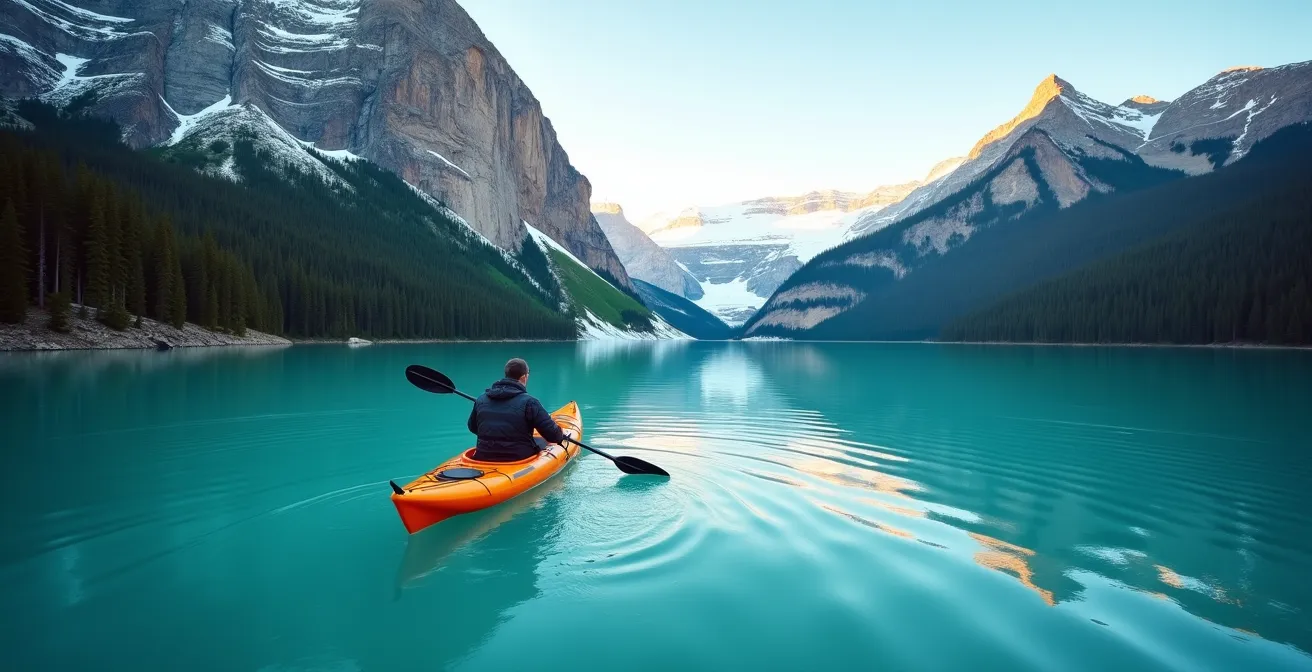
The sticker shock is real. You see the photos—the iconic red canoe gliding across impossibly turquoise water, framed by the Valley of the Ten Peaks. You decide this is a non-negotiable part of your Canadian Rockies trip. Then you see the price: over $140 CAD per hour to rent that canoe. For a photographer or a serious paddler, that fee feels less like a rental and more like a ransom. The dream of spending a golden hour on the water, patiently waiting for the perfect light, suddenly seems financially irresponsible.
The common advice is either to bite the bullet and pay up or to simply admire the view from the crowded shoreline with everyone else. Many assume that bringing their own boat is a logistical nightmare, tangled in regulations, shuttle restrictions, and transport hassles. They believe the “Logistical Gauntlet” is too difficult, especially for those flying into Calgary and renting a car. But what if that assumption is wrong? What if the real secret to unlocking Moraine Lake isn’t a bigger budget, but a smarter strategy?
This guide is the complete tactical playbook for the budget-savvy travel hacker who wants that water-level perspective. We’re rejecting the idea that you have to choose between your wallet and the perfect shot. The key is not the canoe, but a carefully chosen piece of gear: the inflatable kayak. It’s a solvable challenge, and we’ll break down every step, from choosing the right boat and getting it on the shuttle to understanding the science of the lake’s colour and the specific safety rules you must follow. This is how you conquer the logistics and claim your moment on the water.
This article provides a comprehensive roadmap, breaking down every logistical and creative consideration. Explore the detailed sections below to build your own cost-effective Moraine Lake paddling adventure.
Summary: A Paddler’s Tactical Guide to Moraine Lake Photography
- Can You Bring an Inflatable Kayak on the Parks Canada Shuttle?
- Why Lake Louise Looks Grey at 6 AM and Blue at Noon
- Emerald Lake or Lake Louise: Which Offers a Quieter Paddle?
- Why You Should Never Swim After Capsizing in a Glacier Lake
- Canoe or Kayak: Which Is More Stable for DSLR Photography?
- Peyto Lake vs. Bow Lake: Where to Stop for the Best Photo?
- Foam Blocks vs. J-Cradles: How to Transport a Kayak on a Rental Car
- Paddling Canada: A Guide to Safe Kayaking Adventures
Can You Bring an Inflatable Kayak on the Parks Canada Shuttle?
This is the single most important logistical question, and the answer is a resounding yes—with proper planning. Parks Canada has made it clear that they want to support paddle sports, and their shuttle system is designed to accommodate well-prepared individuals. The key isn’t whether you *can*, but *how* you do it. Success hinges on one factor: compactness. Your entire “Hacker’s Kit”—inflatable kayak, pump, and paddles—must be consolidated into a single, manageable bag. Forget trying to carry loose items; you will likely be denied boarding.
Think like an airline passenger. Choose an inflatable kayak model specifically designed to pack down to the size of a large duffel bag or carry-on suitcase. Before you even arrive at the Park and Ride, your gear should be fully packed. This demonstrates to the staff that you are organized and respectful of their limited space. While Parks Canada officially allows inflatable watercraft, the final decision always rests with the on-site staff, and their judgment is based on available space. Arriving early and having your gear neatly packed dramatically increases your chances of a smooth boarding process.
To quantify the financial incentive, consider this cost breakdown. The high rental fee is a major barrier, but bringing your own gear, even if it involves airline fees or a local purchase, provides a much better shot-to-cost ratio over the long run.
| Option | Cost (CAD) | Pros | Cons |
|---|---|---|---|
| Air Canada Checked Kayak Fee | $100 one-way | Keep your own gear | Must meet size restrictions |
| Buy Intex Explorer K2 at Canadian Tire | $150-200 | New equipment, can resell | Time spent shopping |
| Rent at Moraine Lake | $160/hour | No transport hassle | Very expensive for multiple uses |
Finally, remember the last crucial step before you even touch the water. To protect the park’s fragile ecosystems, you must complete the mandatory self-certification permit online. This is a quick process required by Parks Canada to prevent aquatic invasive species. Have the confirmation ready on your phone to show any staff who may ask. Mastering these steps is the core of conquering the Moraine Lake logistical gauntlet.
Why Lake Louise Looks Grey at 6 AM and Blue at Noon
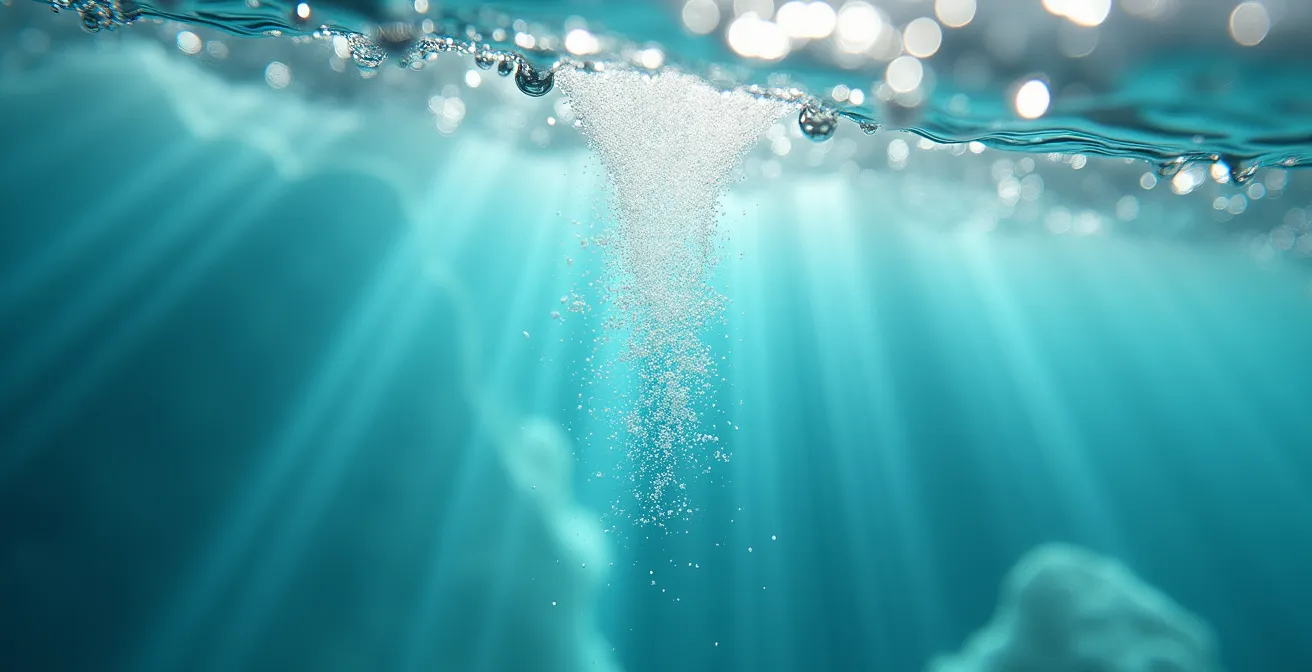
Every photographer visiting the Rockies chases the iconic, vibrant turquoise water. But arriving at sunrise often reveals a lake that looks surprisingly flat, grey, or a muted blue. The brilliant colour is not a constant; it’s a performance of light and geology that peaks during a specific “Turquoise Window.” The secret ingredient is something called rock flour—fine, silt-like particles of rock ground up by the surrounding glaciers and suspended in the water. The water itself isn’t turquoise; the colour is an optical illusion.
When direct, high-angle sunlight hits the lake, it penetrates the water and refracts off these suspended mineral particles. The rock flour absorbs most colours in the light spectrum but reflects the blue and green wavelengths, creating the dazzling turquoise hue that is most intense in late June and July. In the early morning or on an overcast day, the light is too weak or diffuse. Without that strong, direct sunlight, the refraction effect is minimal, and the lake simply reflects the colour of the sky, which is often grey at dawn.
This macro-level view of the particles shows exactly how the magic happens.
As you paddle, you’ll notice the colour isn’t uniform. According to Adventure Alberta’s analysis of Moraine Lake, the colour shifts constantly depending on your location, the sun’s angle, and the water’s depth. It can shift from a vibrant turquoise to a milky emerald or a deep blue. For photographers, this means that mid-day, from roughly 11 AM to 2 PM when the sun is highest, is the absolute best time to capture that iconic colour. Planning your paddle during this window is more important than catching the sunrise.
Emerald Lake or Lake Louise: Which Offers a Quieter Paddle?
While Moraine Lake and Lake Louise are the stars of Banff National Park, their fame comes with a price: crowds and complex logistics. For photographers and paddlers seeking a more serene water-level perspective, nearby Emerald Lake in Yoho National Park presents a compelling alternative. The primary difference is access. Since 2023, access policies have diverged: Moraine Lake requires mandatory shuttle reservations, while Emerald Lake still allows private vehicle access, making it far simpler to transport your own kayak or canoe directly to the shoreline.
This logistical ease translates directly into a quieter experience. While the main lodge area at Emerald Lake can be busy, the lake is large enough that you can quickly paddle away from the crowds and find solitude. For a photographer, this is invaluable. It means fewer boats in your shot, calmer water for reflections, and the freedom to explore different coves and angles without feeling rushed. The shuttle system at Moraine and Lake Louise, while efficient, operates on a schedule that dictates your time on the water.
From a purely photographic standpoint, the backdrops are different but equally stunning. Lake Louise is defined by the massive, iconic Victoria Glacier, offering a grand, expansive vista. Emerald Lake, however, is set within a more intimate mountain amphitheater. Peaks like Mount Burgess and Wapta Mountain create a natural enclosure, which can give photographs a powerful sense of scale and isolation. Many photographers prefer this enclosed feeling, as it creates a more dynamic composition with mountains framing the shot on multiple sides. Ultimately, Lake Louise offers the “famous” shot, while Emerald Lake offers a more peaceful and logistically simple canvas for creative photography.
Why You Should Never Swim After Capsizing in a Glacier Lake
The turquoise water may look as inviting as a Caribbean sea, but the reality is brutally different. The glacial-fed lakes of the Canadian Rockies, including Moraine, Louise, and Emerald, are frigid year-round, with water temperatures hovering just a few degrees above freezing, even in the middle of summer. Falling into this water is not a refreshing dip; it’s a life-threatening emergency. As The Banff Blog bluntly states, your safety is paramount.
The glacial-fed Moraine Lake is frigid all year round and you’re not going to be a happy camper if you end up in the water and require rescue. A fall into this water will surely shock you and you may not be able to swim as well as you are used to under such extreme temperatures.
– The Banff Blog, Moraine Lake Safety Guidelines
The primary danger is not hypothermia, which takes time to set in, but cold water shock. This is an involuntary gasp reflex followed by hyperventilation that occurs when you’re suddenly immersed in icy water. If your head goes under during this initial gasp, you can inhale water and drown instantly, even if you are a strong swimmer. This is why a properly fitted Personal Flotation Device (PFD) is the most critical piece of safety gear; it keeps your head above water during that first critical minute.
Should you capsize, your survival depends on fighting the instinct to swim for shore. You must follow the internationally recognized 1-10-1 cold water survival principle promoted by the Canadian Safe Boating Council. This rule gives you:
- 1 minute to get your breathing under control and fight the panic of cold shock.
- 10 minutes of meaningful movement. This is your window to perform a self-rescue, get back in or on your boat, or signal for help. Your muscle function will rapidly decline after this.
- 1 hour until you become unconscious due to hypothermia.
Your best chance of survival is to stay with your boat. An overturned kayak is a massive flotation device. Get as much of your body out of the water as possible by climbing on top of it, and use your whistle to signal for help. Never, ever, abandon your boat to swim.
Canoe or Kayak: Which Is More Stable for DSLR Photography?
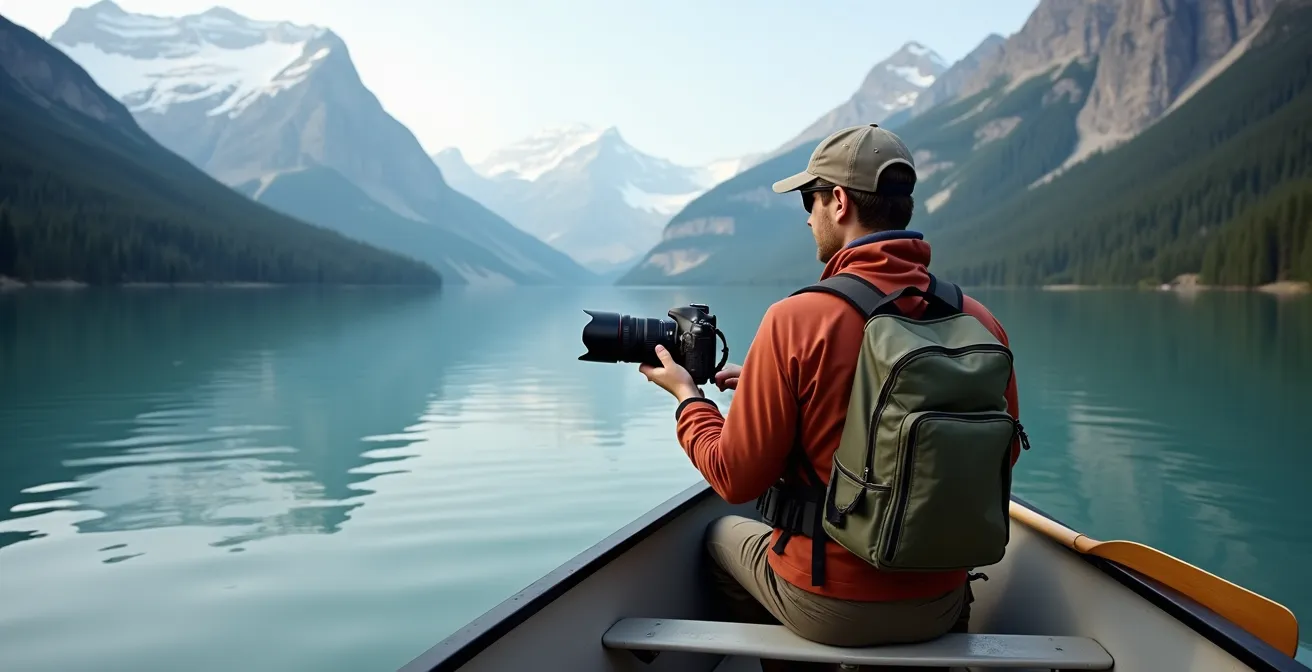
For a photographer, stability is everything. A wobbly boat means blurry shots, a constant fear of dropping expensive gear, and an inability to concentrate on composition. When choosing between the classic rental canoe and your own inflatable kayak at Moraine Lake, the canoe is the undisputed winner for platform stability. The rental canoes are typically wide, with flat bottoms, designed to be exceptionally stable for novice paddlers. This design creates a solid, predictable base that is ideal for handling a heavy DSLR with a telephoto lens.
In contrast, most inflatable kayaks, especially the compact models needed for shuttle transport, have a lower profile and a more rounded hull. While they are very difficult to capsize, they have more “primary” instability, meaning they can feel tippy and rock from side to side. This makes it challenging to hold a heavy camera steady, change lenses, or access gear stored in a dry bag. While a kayak puts you closer to the water for a unique low-angle perspective, the trade-off in stability is often not worth it for serious photography.
The image below perfectly illustrates the ideal setup: a photographer in a stable canoe has the confidence to use a large lens and can even use a dry bag or PFD as a makeshift monopod on the seat in front of them for extra support.
This doesn’t mean you can’t get great photos from an inflatable kayak. The key is to adapt. If you bring your own kayak, you gain the advantage of total freedom in timing and location, far from the rental dock’s one-hour limit. To manage stability, keep your center of gravity low, use a fast shutter speed to counteract movement, and keep your primary camera on a neck strap at all times. For the best of both worlds, a hybrid approach could work: use your inflatable kayak for exploration and scouting, but consider a one-hour canoe rental purely for the dedicated “money shots” where maximum stability is required.
Peyto Lake vs. Bow Lake: Where to Stop for the Best Photo?
The Icefields Parkway is a photographer’s paradise, and two of its most famous stops are Peyto Lake and Bow Lake. While both offer stunning blue water, they present completely different photographic opportunities, especially for a paddler. The choice between them depends entirely on the type of shot you want: an elevated, panoramic viewpoint or an immersive, water-level perspective.
Peyto Lake is famous for its iconic, wolf-shaped outline and incredible colour, best viewed from a high vantage point. The photo opportunity here is exclusively at the designated Bow Summit viewing platform. It’s an incredible, sweeping vista that is a must-do for any landscape photographer. However, for a paddler, Peyto Lake is impractical. There is no easy or official launch point, and the steep, forested shoreline makes carrying a boat down to the water a difficult and potentially dangerous undertaking. Peyto Lake is for looking, not for paddling.
Bow Lake, on the other hand, is a paddler’s dream. Located right beside the highway, it offers a large parking area and an obvious, easy launch point directly from the shore. This accessibility makes it the perfect place to use your own kayak. The photographic opportunities are at water level, allowing you to capture the scale of Crowfoot Mountain and the Bow Glacier from a unique perspective. You can paddle into different coves, use the calm water for perfect reflections, and compose shots that feel much more intimate and immersive than the distant panorama at Peyto.
This table breaks down the key differences for a photographer deciding where to allocate their time.
| Feature | Peyto Lake | Bow Lake |
|---|---|---|
| Water Access | No practical launch point | Easy roadside launch |
| Parking | Limited viewpoint parking | Ample lakeside parking |
| Best Photo Type | Elevated viewpoint only | Water-level paddling shots |
| Crowds | Very busy at viewpoint | Less crowded |
| Kayak Launch | Not feasible | Direct from parking area |
The strategic takeaway is simple: stop at the Peyto Lake viewpoint for the classic aerial shot (no boat needed), but save your paddling time and your “Hacker’s Kit” for the accessible and rewarding waters of Bow Lake.
Foam Blocks vs. J-Cradles: How to Transport a Kayak on a Rental Car
You’ve navigated the flight and the shuttle logistics; now for the final piece of the transport puzzle: getting your kayak from your base in Canmore or Banff to the lakes. If your rental car doesn’t have a roof rack, the budget-savvy travel hacker’s best friend is the foam block kit. While J-cradles offer excellent security, they are expensive and require existing crossbars. A foam block kit is a simple, effective, and incredibly cost-effective solution.
A complete kit can be found at any Canadian Tire for under $100 CAD, based on typical pricing, and includes two foam blocks and all the necessary straps. The blocks sit directly on the car’s roof, providing a cushioned platform for your kayak. The straps are then run through the open doors of the car (never the windows) and tightened inside, securing the boat to the vehicle. This method is surprisingly robust and perfectly safe for highway speeds when done correctly.
However, “done correctly” is the operative phrase. The high winds in the Alberta mountain valleys can exert tremendous force on a kayak. Simply strapping it to the roof isn’t enough; you need to create a secure triangulation with bow and stern lines. These additional lines prevent the kayak from lifting or shifting in crosswinds and are non-negotiable for highway safety.
Your Action Plan: Highway-Proofing Your Kayak Setup for Alberta Winds
- Install foam blocks on the roof, spacing them at the kayak’s widest and most stable points.
- Run the main cam straps through the car’s door frames for the strongest possible anchor point.
- Attach a bow line from the front of the kayak down to the vehicle’s front tow hook or a secure point on the bumper.
- Attach a stern line from the back of the kayak to the rear tow hook or frame to complete the triangulation.
- After the first 10 minutes of highway driving, pull over and re-tighten all straps, as they will have settled.
By following this checklist, you create a stable and secure system that costs a fraction of a traditional roof rack, making it the ideal solution for transporting your personal kayak on a temporary rental vehicle.
Key Takeaways
- The Moraine Lake rental fee is avoidable; a compact inflatable kayak is shuttle-friendly and the key to a budget-friendly trip.
- For transport, a simple foam block kit from a store like Canadian Tire is a cheap and effective way to secure a kayak to a rental car roof.
- Safety is paramount: always wear a PFD and understand the mandatory Transport Canada equipment and Alberta’s Aquatic Invasive Species (AIS) self-certification rules.
Paddling Canada: A Guide to Safe Kayaking Adventures
Getting the perfect shot is the goal, but getting home safely is the priority. Paddling in the Canadian Rockies, especially on cold, remote, glacier-fed lakes, comes with a set of non-negotiable responsibilities. Before your boat ever touches the water, you must be compliant with two key sets of regulations: Transport Canada’s mandatory safety equipment rules and Parks Canada’s Aquatic Invasive Species (AIS) prevention protocols.
First, your watercraft is considered a vessel under Canadian law, and you must have specific safety gear on board. This isn’t a suggestion; it’s a legal requirement, and Parks Canada staff or RCMP can perform spot checks. A violation can result in significant fines. The required equipment provides the essential tools for self-rescue and signaling for help in an emergency.
According to Transport Canada, your mandatory gear includes:
- A Canadian-approved Personal Flotation Device (PFD) or lifejacket for each person, which must be worn or within arm’s reach.
- A 15-meter (50-foot) buoyant heaving line for rescue.
- A sound-signaling device, typically a whistle attached to your PFD.
- A bailer or manual water pump to remove water from your boat.
- A navigation light if you plan to be on the water between sunset and sunrise.
Second, you have a duty to protect the park’s fragile ecosystem. Parks Canada has a strict policy to prevent the spread of Aquatic Invasive Species. As Parks Canada states, visitors must complete a Self-Certification Permit for any non-motorized watercraft. This is an online form you must fill out before your trip. The core of this policy is the “Clean, Drain, Dry” principle. You must declare that your boat has been cleaned of all mud and debris, drained of all water, and has been dry for at least 48 hours before entering a new body of water in Alberta. This mandatory self-certification is a critical step in being a responsible visitor.
Now that you have the complete playbook, from transport logistics to safety regulations, you are fully equipped to plan your own budget-friendly paddling adventure. Start by researching a compliant inflatable kayak and book your Parks Canada shuttle to embark on an unforgettable photographic journey.