In summary:
- Successful Maritime photography requires mastering the elements—fog, tides, and light—not just visiting famous spots.
- Choose locations like Swallowtail Lighthouse for narrative depth over crowded icons like Peggy’s Cove.
- Mastering manual mode is essential for capturing unpredictable conditions like fog and the Northern Lights.
- Protecting your gear from corrosive salt air with a daily cleaning ritual is non-negotiable.
- Safety, especially around tides and cliffs, is paramount for both the photographer and the preservation of the landscape.
The allure of Canada’s East Coast is undeniable for any photographer. It’s a landscape of rugged beauty, where iconic lighthouses stand sentinel against the Atlantic’s might and colourful fishing villages seem frozen in time. Many arrive with a checklist: Peggy’s Cove at sunset, the Cabot Trail in autumn, the Hopewell Rocks at low tide. They capture beautiful pictures, but often leave with images that feel familiar, like postcards they’ve already seen.
But the true art of Maritime photography lies beyond this checklist. It’s a patient dialogue with the elements. It’s about understanding that the dense fog isn’t an obstacle but a natural softbox, that the world’s highest tides aren’t just a spectacle but a force that composes and recomposes the landscape every six hours. The secret to capturing the region’s soul is not in *where* you point your lens, but in *how* you engage with the unpredictable character of the coast.
This guide moves beyond the obvious. We will explore how to use the elements to your advantage, from harnessing fog for moody compositions to understanding the physics of light on water. We’ll delve into the technical decisions that separate a snapshot from a story and discuss the essential, often-overlooked practice of protecting your gear from the very air that makes this place so magical. It’s time to chase the light with intention.
This comprehensive guide will walk you through the key considerations for elevating your photography on Canada’s East Coast. From technical settings to compositional storytelling, you’ll find the insights needed to create truly memorable images.
Summary: Photographing the Maritimes: A Guide to Light and Landscape
- How to Use Atlantic Fog to Create Moody Coastal Photos
- Peggy’s Cove vs. Swallowtail: Which Lighthouse Offers the Best Composition?
- Why You Must Check Tide Tables Before Photographing Hopewell Rocks
- Lunenburg’s Colours: Tips for Shooting Urban Landscapes in Bright Sun
- The Salt Air Mistake That Corrodes Camera Lenses in One Trip
- Why Auto Mode Will Ruin Your Northern Lights Photos
- Why Lake Louise Looks Grey at 6 AM and Blue at Noon
- Hiking Newfoundland’s East Coast Trail: Safety on the Edge
How to Use Atlantic Fog to Create Moody Coastal Photos
For many, fog is a frustrating disruption. For a landscape photographer on the East Coast, it is a gift. Fog is a powerful tool for creating mood, simplifying chaotic scenes, and isolating subjects. It diffuses harsh light, softens backgrounds, and adds a layer of mystery that is quintessentially Maritime. Instead of packing your gear away, you should be running for your camera. The key is to take control away from your camera’s automatic brain, which struggles with the low contrast and high brightness of a foggy day.
Mastering atmospheric optics means working with the fog, not against it. Your camera’s light meter will likely be fooled by the bright whiteness and attempt to underexpose the scene, turning your beautiful, ethereal mist into a muddy grey. You must consciously overexpose. Furthermore, autofocus systems hunt endlessly in low-contrast fog. Switching to manual focus and using your camera’s live view to zoom in on a subject is the only reliable method. This deliberate, patient approach is the foundation of successful fog photography.
The principles are timeless. Even decades ago, photographers understood this dialogue with the elements. For example, a classic 1984 photo of Baltimore Harbour in fog was captured with a fully manual process, using an Olympus OM-4 and a long exposure of approximately 8 seconds on high-ISO film to see through the mist and create a powerful, moody image. This demonstrates that the core techniques of manual control transcend technology.
- Start with an ISO between 200-800 to maintain image quality in the dim light.
- Use a wider aperture, like f/4 to f/5.6, to create a shallow depth of field that keeps the fog soft while your subject remains sharp.
- Apply +1 to +2 stops of exposure compensation to counteract your camera’s tendency to underexpose bright fog.
- Switch to manual focus; autofocus will fail in these low-contrast conditions.
- Set your white balance manually or shoot in RAW format for maximum flexibility in post-processing.
Embracing fog is embracing a different kind of seeing. It’s about suggestion rather than depiction, and it’s one of the most effective ways to capture the true, soulful character of the Atlantic coast.
Peggy’s Cove vs. Swallowtail: Which Lighthouse Offers the Best Composition?
The lighthouse is the quintessential Maritime subject, but not all lighthouses tell the same story. The choice between a world-famous icon like Peggy’s Cove in Nova Scotia and a remote outpost like Swallowtail on Grand Manan, New Brunswick, is a choice about the narrative you want to create. Peggy’s Cove is undeniably beautiful, perched on vast granite barrens. However, it presents a significant challenge: crowds. Composing a shot that feels timeless and serene requires immense patience, clever angles, or extensive post-processing to remove the constant stream of visitors.
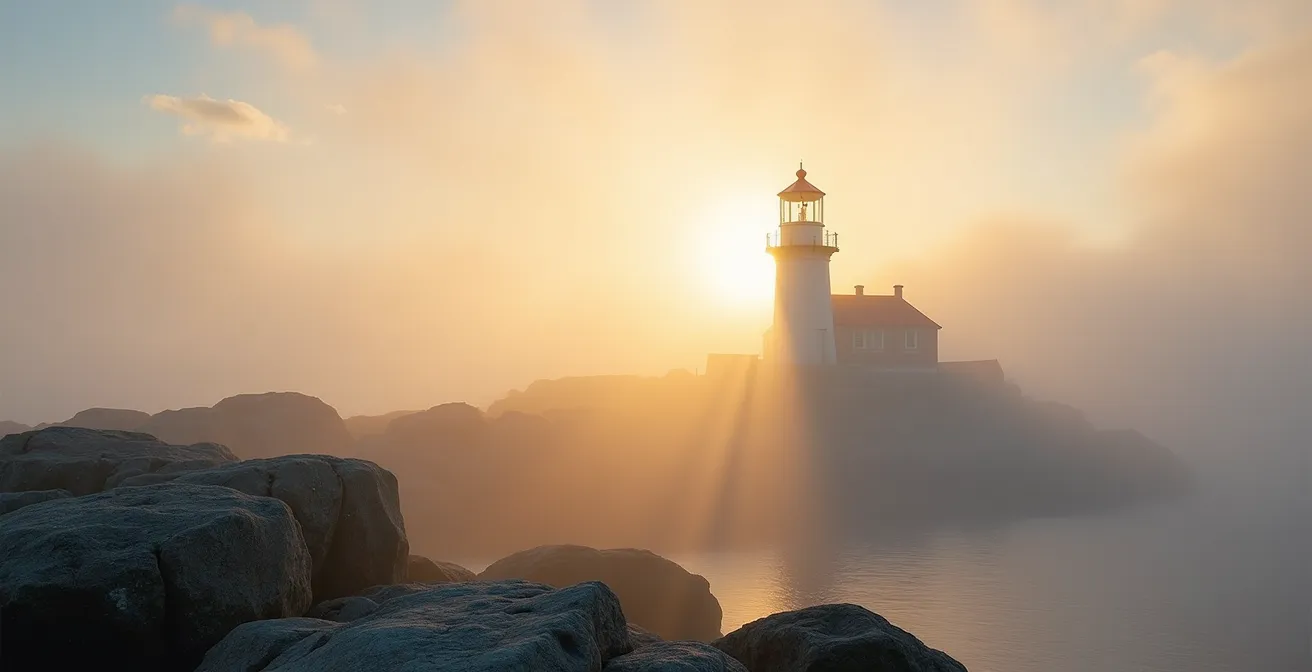
Swallowtail, on the other hand, offers a different kind of story: one of narrative isolation and resilience. It’s a less-visited gem that rewards the adventurous photographer. Its dramatic perch on vertical cliffs provides powerful leading lines, and the quiet environment allows for a more contemplative approach. While Peggy’s Cove tells a human-centric story of a working fishing village, Swallowtail speaks to the raw, untamed power of nature and the steadfastness of the light against it. The photographic challenge here isn’t managing tourists, but safely navigating the terrain to find the best vantage points.

As you can see, the composition at a location like Swallowtail is inherently dramatic. The cliffs create a sense of scale and precariousness that is difficult to replicate in the more horizontal landscape of Peggy’s Cove. The best choice depends on your goal: do you want to capture a beloved, shared cultural symbol, or do you want to create a more personal, dramatic image that speaks of solitude and endurance?
This table breaks down the key compositional and practical differences for a photographer deciding between these two iconic Canadian lighthouses.
| Feature | Peggy’s Cove (NS) | Swallowtail (NB) |
|---|---|---|
| Best Time | Golden hour/sunset | Morning fog conditions |
| Composition Style | Wide granite barrens for foreground | Vertical cliffs for leading lines |
| Crowd Level | Very high – tourist destination | Low – isolated location |
| Photographic Story | Human-centric, working village | Isolated resilience, dramatic perch |
| Technical Challenge | Managing crowds in frame | Accessing cliff viewpoints safely |
Ultimately, a professional’s portfolio would benefit from both, but understanding what each location uniquely offers allows you to plan your shoot with a clear artistic vision from the outset.
Why You Must Check Tide Tables Before Photographing Hopewell Rocks
Nowhere on Earth is the concept of “temporal composition” more dramatic than at the Bay of Fundy. The landscape here is not static; it is a dynamic stage, completely transformed by the highest tides in the world. At Hopewell Rocks in New Brunswick, this isn’t just a detail—it’s everything. The difference between high and low tide is the difference between two entirely different worlds. At low tide, you can walk on the ocean floor, dwarfed by the massive “flowerpot” sea stacks. At high tide, those same formations become small islands, with the water lapping near their forested tops.
Failing to check the tide tables is not just a missed opportunity; it is a serious safety risk. The incoming tide moves swiftly, and photographers focused on their composition can easily be cut off from the exit stairs. The Bay of Fundy’s extreme tidal range reaches an astonishing 16 meters (52 feet) in some areas, a colossal volume of water that reshapes the coastline every six hours. You are not visiting a static park; you are a temporary guest on the ocean floor, and your visit is dictated entirely by the moon and the sea.
Planning your visit requires military precision. You must know the exact times for high and low tide and, most importantly, the time you must be off the ocean floor. The park wisely makes your entrance fee valid for two consecutive days, encouraging you to witness both extremes. This is not a location for a quick, spontaneous visit; it is a destination that demands respect, planning, and an appreciation for the immense power of nature.
Your Action Plan: Tide Safety for Photographers
- Tide Tables: Check official tide tables on the park’s website before you even leave your hotel to plan your shoot.
- Safe Exit: Plan to be completely off the ocean floor at least 30 minutes before the posted mid-tide time to avoid being trapped.
- Footwear: Wear sturdy, waterproof boots. The ocean floor is a beautiful but slippery and muddy mixture of rock, sand, and seaweed.
- Alarms: Set multiple alarms on your phone for your planned exit time. It’s easy to lose track of time when you’re absorbed in photography.
- Two-Day Pass: Take advantage of your ticket’s validity for two consecutive days to capture the profound contrast between low and high tide.
By treating the tide not as an inconvenience but as your creative partner, you can capture the full, dramatic story of this extraordinary Canadian landscape.
Lunenburg’s Colours: Tips for Shooting Urban Landscapes in Bright Sun
Lunenburg, a UNESCO World Heritage site, is a feast for the eyes. Its waterfront is lined with brightly-coloured heritage buildings that pop with vibrant reds, blues, and yellows. The common advice for photographers is to shoot during the “golden hour” to avoid the harsh light of midday. While this is sound advice for flattering portraits and soft landscapes, it can mean missing a unique opportunity that bright, direct sun offers in a place like Lunenburg: the chance to play with geometry, texture, and abstraction.
Instead of seeing harsh sun as a problem, a seasoned photographer sees it as a different kind of tool. The high contrast creates deep, sharp shadows that can be used as powerful compositional elements. A diagonal shadow cutting across a brightly painted wall becomes a dynamic leading line. The intense light also brings out the rich texture of the weathered clapboard siding, telling a story of decades of exposure to the salt air. In bright sun, your subject might not be the entire building, but a small, abstract composition of colour, shadow, and texture.

This approach requires you to change your way of seeing. Forget the wide, establishing shot. Get closer. Use a longer lens to isolate compelling details. Look for the interplay of light and shadow on a single wall, the way a rusty boat cleat casts a stark shadow on a blue facade, or the geometric patterns created by overlapping rooflines. A circular polarizing filter becomes your best friend in these conditions, as it can cut through the glare on painted surfaces, dramatically increasing colour saturation and making those reds and blues even richer.
So while others pack up their gear at 10 AM, you can be just getting started, finding the hidden, abstract beauty that only reveals itself under the full power of the sun.
The Salt Air Mistake That Corrodes Camera Lenses in One Trip
The very element that makes Maritime landscapes so evocative—the salt-laced air—is a silent and relentless threat to your camera equipment. The biggest mistake a photographer can make on the East Coast is underestimating the corrosive power of salt spray. It’s not just about getting splashed by a wave; it’s about the microscopic, aerosolized salt particles that are constantly in the air, settling on every surface. Official environmental studies have shown that salt spray can begin corroding unprotected camera equipment within 24 hours.
This isn’t a slow, gradual process. A single trip can be enough to cause permanent damage. Salt can etch the delicate coatings on your lens elements, degrading image quality. It can work its way into the moving parts of your lens barrels and tripod legs, causing them to seize up. It seeps into electronic contacts, leading to intermittent failures. Proper gear stewardship is not an optional extra; it is an essential, non-negotiable part of the professional workflow in this environment. It means adopting a daily cleaning ritual without fail.
At the end of every single day of shooting, before you even think about downloading your photos, you must perform this maintenance. It’s a systematic process to remove the day’s accumulation of salt and humidity, ensuring your gear is ready and reliable for the next day’s shoot. Ignoring this step is a costly gamble, risking thousands of dollars in equipment for the sake of a few minutes’ convenience.
- Wipe down all external camera and lens surfaces with a microfiber cloth slightly dampened with distilled water (not tap water, which contains minerals).
- Clean the front and rear lens elements with a proper lens cleaning solution and a fresh lens tissue, working in a spiral from the centre outwards.
- Remove and clean your lens filters (like UV or polarizers) separately. Salt loves to build up in the threads between the filter and the lens.
- Inspect and clean your tripod thoroughly, paying close attention to the leg locks and joints where salt and sand can accumulate.
- Store your gear overnight in a sealed camera bag with fresh silica gel packets to absorb any residual humidity.
Treating your equipment with this level of care is a hallmark of professionalism and ensures your investment will survive to capture many more adventures.
Why Auto Mode Will Ruin Your Northern Lights Photos
Seeing the Northern Lights dance across a dark Maritime sky is a magical experience. Attempting to capture it with your camera set to “Auto” will almost certainly result in disappointment. The reason is simple: your camera’s automatic mode is designed to evaluate a “normal” scene and expose it to a medium brightness. But an aurora-filled sky is anything but normal. It’s a scene of profound darkness punctuated by faint, moving light. Auto mode will see the darkness, assume the scene is underexposed, and respond by jacking up the ISO to noisy levels and/or using a flash—both of which will completely ruin the shot.
To capture the aurora, you must take full manual control. This is a conversation between you, your camera, and the faint light of the cosmos. As a professional nature photographer based in Nova Scotia, this is a subject I am deeply passionate about. As I’ve shared in my role as a Canon Creator Lab Ambassador, astrophotography is about precision and patience.
My name is Simon d’Entremont and I’m a professional nature, astrophotography and wildlife photographer living in Nova Scotia, Canada
– Simon d’Entremont, Canon Creator Lab Ambassador Profile
Manual mode allows you to make the specific choices needed: a wide-open aperture to gather as much light as possible, a high-but-controlled ISO to make the sensor sensitive, and a long shutter speed to allow that faint light to “paint” onto the sensor. Focusing must also be done manually, typically by using your camera’s live view, zooming in on the brightest star or planet, and adjusting the focus ring until it is a pinpoint-sharp dot. These are all deliberate actions that Auto mode is incapable of performing.
- ISO: Start at ISO 3200 for the Milky Way or fainter aurora, and you can adjust down to 1600 if the lights are very bright and you’re using a longer exposure.
- Aperture: Use the widest aperture your lens allows (e.g., f/1.8 to f/2.8) to maximize light gathering.
- Shutter Speed: A good starting point is 15-20 seconds. Use the “500 Rule” (500 divided by your lens’s focal length) to determine the maximum shutter speed before stars begin to trail.
- Focus: Use manual focus set to infinity. The most accurate way is to use Live View, zoom in on a distant, bright star, and manually adjust until it’s a sharp point.
- White Balance: Set it manually to around 3800K for a natural-looking night sky, but shooting in RAW allows you to fine-tune this later.
Leaving Auto mode behind is the first and most critical step towards capturing the breathtaking beauty of the night sky.
Why Lake Louise Looks Grey at 6 AM and Blue at Noon
The optical phenomenon that gives glacial lakes like Lake Louise their famous turquoise colour is a fascinating lesson in physics that applies directly to photographing any body of water, including the diverse waters of the Atlantic coast. The vibrant colour is not from the water itself, but from sunlight refracting off fine particles of rock flour suspended in it. The colour’s intensity, however, is entirely dependent on the angle and quality of the light hitting the surface. At 6 AM, with the sun low, much of the light reflects off the water’s surface as glare, preventing it from penetrating and illuminating the particles below. This results in a greyer, more muted appearance.
As the sun climbs higher in the sky towards noon, its angle becomes more direct. More light penetrates the water’s surface, interacts with the suspended rock flour, and reflects the blue-green wavelengths back to our eyes (and our camera sensors). This same principle explains why the waters of the Northumberland Strait can look teal under a high sun, while the deeper Atlantic off Halifax can look like steel-blue in the early morning. The location and its specific water body—be it the Fraser River or Thacker Marsh in other parts of Canada—contribute unique qualities, but the light is the ultimate determining factor.
For a photographer, this means you can control the perceived colour of the water not just by waiting for the right time of day, but by using a circular polarizing filter. This tool is essential for managing reflections on the water’s surface. By rotating the filter, you can selectively cut out the glare, allowing the camera to see the “true,” saturated colour of the water beneath. In the early morning, a polarizer can help cut through the surface glare to reveal some of the deeper steel-blue tones. At midday, it can enhance the vibrant turquoise or teal by eliminating distracting reflections.
The effect of a polarizer changes dramatically with the time of day and your position relative to the sun, as this table illustrates for various Atlantic Canadian locations.
| Time of Day | Water Color Without Polarizer | With Polarizer Effect | Best Location Example |
|---|---|---|---|
| Early Morning (6-8 AM) | Grey-blue with surface glare | Deep steel blue, visible underwater features | Halls Harbour at high tide |
| Midday (11 AM-2 PM) | Bright turquoise with reflections | Saturated teal, reduced glare | Basin Head ‘Singing Sands’ PEI |
| Golden Hour | Warm amber reflections | Enhanced blue with golden highlights | Cabot Trail viewpoints |
Understanding this “why” allows you to move from passively hoping for good colour to actively creating it, whether you’re in the Rockies or on the coast of Prince Edward Island.
Key takeaways
- Embrace the Elements: Don’t fight fog and harsh light; use them as compositional tools to create mood and texture.
- Heed the Tides: The Bay of Fundy’s tides are a powerful compositional force and a serious safety risk. Always check the tide tables.
- Practice Gear Stewardship: A daily cleaning ritual is the only way to protect your camera and lenses from the corrosive Atlantic salt air.
Hiking Newfoundland’s East Coast Trail: Safety on the Edge
Newfoundland’s East Coast Trail is a world-class hiking and photography destination, offering over 300 kilometres of rugged, dramatic coastline. For a photographer, the temptation is to get as close to the edge as possible for that epic, vertigo-inducing shot of cliffs plunging into the churning Atlantic. However, this pursuit of the perfect composition must be balanced with an unwavering commitment to safety and respect for the trail. The cliffs are often unstable, subject to erosion from the very waves you’re trying to capture, and coastal weather can bring sudden, powerful wind gusts.
A professional’s approach to cliff-edge shooting is one of calculated caution. It involves establishing a safe base of operations *before* bringing out the camera. This means setting up your tripod well back from the edge (a minimum of two metres is a good rule), ensuring it is on stable ground. It means using your camera’s strap at all times and favouring the live view screen over the viewfinder, which allows you to maintain better peripheral awareness of your footing and surroundings. Sturdy, ankle-supporting hiking boots are non-negotiable.
Beyond personal safety, there is a deeper responsibility. The East Coast Trail is a treasure maintained by a dedicated association and the goodwill of landowners. As photographers and visitors, we are guests here. Adhering to leave-no-trace principles is paramount. This ethic of respect is a core part of responsible photography in Canada’s wild spaces.
Leave-no-trace principles and respecting segments of trail that cross private land are crucial aspects of responsible tourism in Canada.
– East Coast Trail Association, Trail Safety Guidelines 2024
Your safety protocol should be as ingrained as your camera settings. Before you press the shutter, you should have already assessed the risks and taken steps to mitigate them. No photograph is worth a life, nor is it worth damaging the fragile environment that makes the location so special in the first place.
- Set up your tripod at least 2 metres back from any cliff edge before you begin composing your shot.
- Use your camera’s Live View mode instead of the viewfinder to maintain awareness of your surroundings.
- Wear sturdy, waterproof footwear, as trails and shorelines can be treacherous.
- Always have your camera strap attached and wrapped around your wrist when shooting handheld near edges.
- Check the weather forecast specifically for wind gusts, which can affect your balance and the stability of your equipment.
By putting safety and respect first, you can ensure that you and others can continue to enjoy and photograph the breathtaking beauty of the East Coast Trail for years to come. Begin planning your photographic journey today by adopting this mindset of patient, respectful, and safe exploration.