Many believe snowshoeing is just a simple alternative to skiing, essentially ‘walking on snow.’ The reality is that truly enjoying Canada’s winter trails is about acquiring a deeper ‘winter literacy’—understanding the unwritten rules of the trail, reading the stories left in the snow, and mastering the nuances of safety and comfort. This guide shifts the focus from just gear to the skills and mindset needed to transform a winter walk into a profound connection with nature.
The vast, quiet beauty of a Canadian winter landscape can feel inaccessible if you’re not a skier. While ski resorts buzz with activity, many non-skiers feel relegated to the sidelines, assuming the only way to enjoy the snow is on two planks. The common advice is to simply “get some snowshoes and walk,” but this misses the entire point. It overlooks the rich, subtle experience that awaits those willing to look a little closer.
This isn’t just about avoiding ‘post-holing’—sinking deep into the snow with every step. It’s about learning a new language spoken in animal tracks, understanding the silent social contract of a shared trail, and respecting the immense power of the mountains. But what if the key to unlocking winter wasn’t just strapping on a pair of snowshoes, but adopting a new mindset? What if the real joy came from understanding the ‘why’ behind the rules and the ‘how’ behind staying safe and comfortable?
This guide is designed for the curious non-skier. We’ll move beyond the basics to explore how to dress for performance, not just for warmth. We’ll delve into the culture of trail etiquette, the art of choosing the right gear for the conditions, and the critical safety skills needed to explore with confidence. It’s time to stop watching winter from the window and start participating in it.
To help you navigate this journey from beginner to confident winter explorer, this article covers everything from the fundamentals of dressing correctly to the essential rules of trail safety. Explore the topics below to build your knowledge step-by-step.
Table of Contents : Snowshoeing for Non-Skiers: How to Enjoy Winter Trails
- Why You Should Dress Lighter for Snowshoeing Than for Walking
- Snowshoe and Fondue: Why This Combo is the Perfect Winter Date
- Why Walking in Ski Tracks is the Ultimate Snowshoe Sin
- Aluminum vs. Traditional Wood: Which Snowshoe Fits Your Weight?
- How to Identify Hare and Fox Tracks on Your Morning Walk
- Microspikes vs. Snowshoes: Which One Do You Need for Packed Trails?
- Why Altitude Sickness Hits Hikers in the Rockies Below 3000m
- Winter Hiking 101: Conquering Snowy Trails Safely
Why You Should Dress Lighter for Snowshoeing Than for Walking
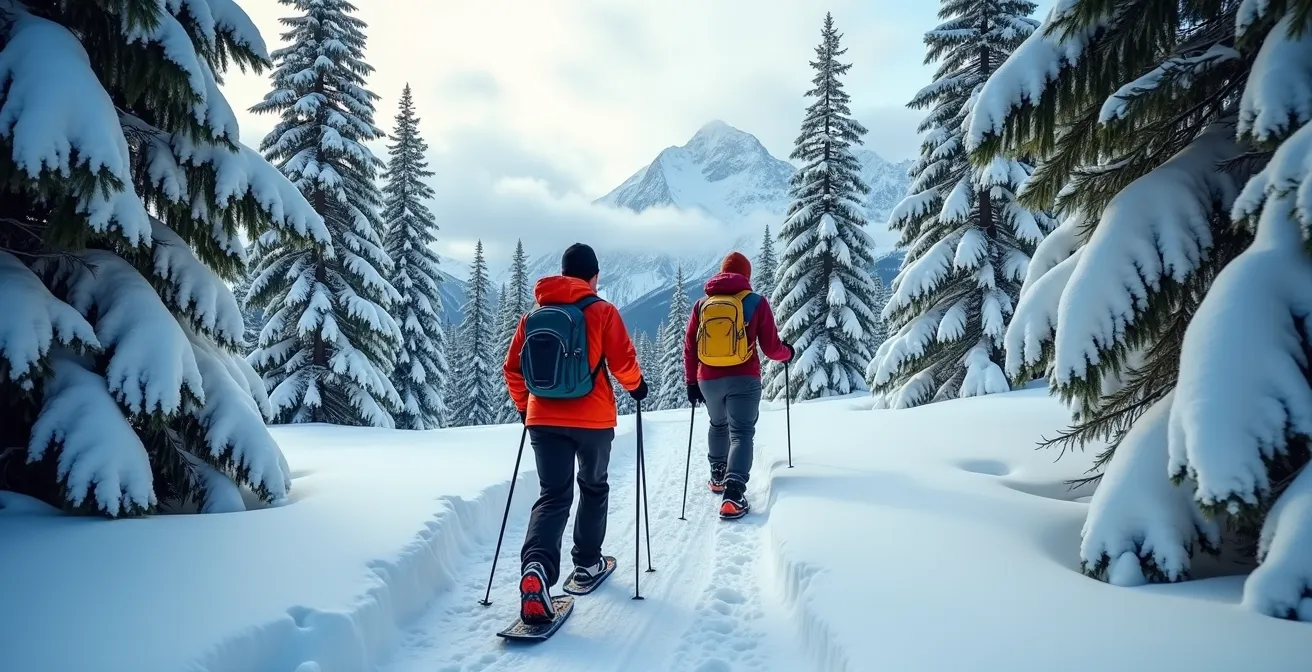
The most common mistake beginners make is over-dressing. Snowshoeing is a high-cardio activity, far more strenuous than a simple winter walk. Your body becomes a furnace, and that heavy parka that keeps you warm while waiting for a bus will quickly become a personal sauna on the trail. The key is to embrace a counter-intuitive principle: Be Bold, Start Cold. You should feel slightly chilled at the trailhead, because you will warm up dramatically within the first 15 minutes of activity.
The secret to comfort is a dynamic layering system designed for heat management, not just insulation. It starts with a moisture-wicking base layer (like merino wool or a synthetic fabric) to pull sweat away from your skin. Next, add a fleece or light insulated jacket as a mid-layer for warmth. Finally, an uninsulated waterproof and windproof shell protects you from the elements. This system allows you to add or remove layers to perfectly regulate your temperature.
This is especially critical in environments like the Canadian Rockies, where there can be a 20-30 degree temperature difference between the crisp morning air and the surprisingly warm midday sun. Having extra layers in your pack to put on during breaks is just as important as starting with fewer layers on.
Snowshoe and Fondue: Why This Combo is the Perfect Winter Date
Snowshoeing elevates the simple “walk in the park” to a memorable adventure, making it an ideal activity for a date. It’s active, engaging, and immerses you both in the quiet magic of a winter forest. Unlike skiing, the pace is slower, allowing for easy conversation. The shared effort of breaking a new trail or navigating a scenic route builds a natural sense of teamwork and connection. It’s an experience that’s both invigorating and intimate.

The real magic, however, lies in the “après-snowshoe.” After an hour or two of crisp air and physical exertion, the promise of a warm, rewarding meal completes the experience. A bubbling pot of cheese fondue, shared by candlelight in a rustic lodge or even prepared at home, is the perfect conclusion. It’s a communal, fun, and decadent reward that turns a simple day out into a truly romantic and noteworthy event. Packing a thermos of hot chocolate to share at a scenic viewpoint along the trail can also create a special moment.
Across Canada, this combination of outdoor activity and cozy culinary reward is a celebrated part of winter culture. For instance, trails in the Ottawa region are dotted with places to warm up, from the Britannia Coffeehouse to The Mill Street Brew Pub, offering everything from hot drinks to full meals right off the trail. This focus on the post-hike experience is what elevates snowshoeing from mere exercise to a cherished social ritual.
Why Walking in Ski Tracks is the Ultimate Snowshoe Sin
On a shared winter trail, you will often see two perfectly parallel grooves cut into the snow. These are cross-country ski tracks, meticulously set by a grooming machine. To a snowshoer, they might look like convenient pathways, but walking on them is the most significant breach of winter trail etiquette. This isn’t just about being polite; it’s a matter of safety and respect for the trail system and other users. It’s a core tenet of good ‘trail citizenship.’
The reason is simple: your snowshoes will destroy the tracks. The metal crampons on the bottom of your snowshoes punch holes and create deep ruts in the carefully sculpted grooves. As Ontario Parks explains, these ruts can freeze over, creating hazardous and unpredictable conditions for skiers. A smooth, gliding track is essential for classic cross-country skiing, and damaging it can ruin the experience for others and even cause falls or injuries. The rule is absolute: always snowshoe beside the ski tracks, never in them.
Good trail citizenship extends beyond just avoiding the tracks. It’s about sharing the space harmoniously. This includes a few key practices:
- If you must cross ski tracks, do so by stepping directly over them, minimizing contact.
- Keep dogs off the groomed tracks as their paws cause the same damage.
- Always yield the right of way to downhill skiers, as they have more difficulty stopping.
- On narrow, single-track trails, walk in single file to allow faster parties or skiers to pass easily.
Aluminum vs. Traditional Wood: Which Snowshoe Fits Your Weight?
Choosing your first pair of snowshoes can be daunting. The two main families are modern aluminum-frame snowshoes and traditional wooden ones. While they both achieve the same basic goal—keeping you from sinking in the snow (known as ‘floatation’)—they are designed for very different experiences. Your choice depends on your weight, the type of snow you’ll encounter, and the kind of terrain you wish to explore.
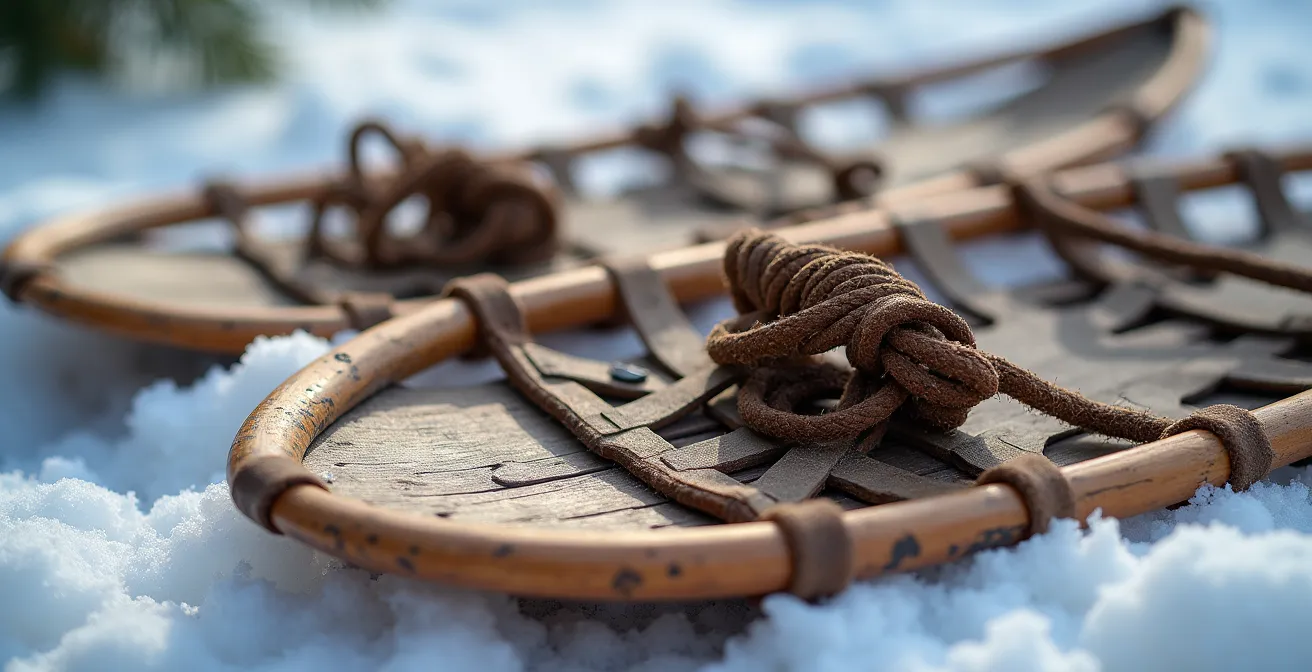
Traditional wooden snowshoes, often made with an ash frame and rawhide lacing, are a nod to the rich Indigenous history of winter travel in Canada. Their primary advantage is superior floatation. Their large surface area is unmatched for distributing weight in deep, light, powdery snow. However, they typically offer less grip and are less ideal for icy, steep, or packed-down terrain.
Modern aluminum snowshoes are the versatile all-rounders. They are smaller, lighter, and feature aggressive steel crampons underfoot and along the frame, providing excellent traction on varied terrain. They excel on packed trails, rolling hills, and icy patches. Sizing for both types is crucial and is based on the total weight you’ll be carrying (your body weight plus your pack). A heavier person or someone carrying a heavy pack will need a larger snowshoe to achieve the same floatation as a lighter person. For most beginners exploring established trails in Canada, a pair of 25- to 30-inch aluminum snowshoes is the most practical and versatile starting point.
How to Identify Hare and Fox Tracks on Your Morning Walk
One of the greatest joys of snowshoeing is the realization that the silent, snowy landscape is actually teeming with life. The fresh snow acts as a canvas, recording the movements of the forest’s unseen inhabitants. Learning to read these stories in the snow is a skill Parks Canada calls ‘winter literacy.’ It transforms a simple walk into a detective story, connecting you more deeply to the ecosystem you’re exploring.
You don’t need to be an expert to start recognizing common patterns. The snowshoe hare, for example, leaves a very distinctive track. Its large hind feet land ahead of its smaller front feet, creating a clear ‘Y’ or triangular pattern in the snow. A fox or coyote, by contrast, will often leave a surprisingly straight line of prints, as they place their hind paws directly into the print left by their front paws to conserve energy.
This skill is more than just a curiosity; it’s a critical safety tool. Recognizing fresh moose tracks (large, heart-shaped prints) should be a sign to be extra vigilant or even change your route, as moose can be unpredictable and aggressive in winter when food is scarce. Following the principles of wildlife safety is paramount:
- Make noise as you hike to avoid surprising animals.
- Never follow tracks or approach wildlife. Keep a safe distance for photos.
- Carry bear spray and know how to use it, even in winter.
- Report sightings of predators like cougars or wolves to the local park authority.
Microspikes vs. Snowshoes: Which One Do You Need for Packed Trails?
A common point of confusion for winter hikers is when to use snowshoes versus other traction aids like microspikes. Putting on snowshoes for a hard, icy trail is as ineffective as wearing boots in deep powder. The choice is not about preference; it’s a direct response to the snow conditions. Snowshoes are for floatation in deep snow, while microspikes are for traction on hard, icy surfaces.
Microspikes are chains with small spikes that you pull over your regular waterproof hiking boots. They are brilliant for well-trodden, packed-down trails or routes that have become icy. They provide a tenacious grip but offer zero floatation. If the snow is deeper than about 15 centimetres (6 inches), you will ‘post-hole’ with every step, which is exhausting and damages the trail for others. Experienced hikers on popular trails in places like Vancouver often find that snowshoes are carried more often than worn, with microspikes being the primary tool for the conditions.
The best way to decide is to assess the trail conditions before you go. This decision matrix can serve as a simple guide for your Canadian winter adventures.
| Condition | Equipment Choice | Canadian Example | Why |
|---|---|---|---|
| Icy, packed trails | Microspikes/Crampons | Grouse Grind in winter | Better grip on hard ice |
| Fresh snow >15cm | Snowshoes | Gatineau Park after snowfall | Prevents postholing |
| Mixed conditions | Carry both | Variable mountain terrain | Adapt to changing snow |
| Groomed trails | Microspikes | Resort cross-country areas | Minimal surface disruption |
Why Altitude Sickness Hits Hikers in the Rockies Below 3000m
Many travellers associate altitude sickness with the towering peaks of the Himalayas or the Andes. They are often surprised when they experience symptoms like headaches, nausea, and dizziness on a relatively modest hike in the Canadian Rockies. While many trails start from towns like Banff or Canmore (around 1,400m), they can quickly ascend to over 2,500m. At these elevations, the air pressure is lower, and your body gets less oxygen with each breath.
The issue in the Rockies is often compounded by other factors. As experts at the Canadian Rockies Experience point out, it’s more than just altitude. The cold air, physical exertion of snowshoeing, and dehydration all increase your body’s oxygen demand, making you more susceptible. The biggest mistake visitors make is arriving from sea level and immediately attempting a strenuous, high-elevation hike on their first day.
The key to prevention is gradual acclimatization. Giving your body at least 24 hours to adjust before pushing it can make all the difference. If you’re visiting the Rockies from a lower elevation, a simple acclimatization protocol can help you avoid illness and enjoy your trip:
- On your first day, focus on hydration and avoid alcohol. Take a gentle walk at town elevation.
- Ensure you get a good night’s sleep at a moderate elevation.
- For your first outing, choose an easier trail that stays below 2,000m.
- Pay close attention to your body. If you develop a persistent headache or feel nauseous, the only cure is to descend to a lower elevation immediately.
Key Takeaways
- Adopt the “Be Bold, Start Cold” mantra; you’ll warm up in 15 minutes. Dress in removable layers.
- Respect trail etiquette: Never walk on groomed cross-country ski tracks. This is the cardinal rule of shared winter trails.
- Choose your gear based on conditions: Snowshoes for deep snow (floatation), microspikes for icy trails (traction).
Winter Hiking 101: Conquering Snowy Trails Safely
As you venture from simple park trails into the backcountry, your ‘winter literacy’ must evolve to include the most critical skill of all: avalanche awareness. In mountainous terrain like that found across British Columbia and Alberta, many beautiful snowshoe trails pass through or below avalanche paths. Assuming a trail is safe just because it’s popular is a dangerous mistake. An avalanche does not distinguish between a skier and a snowshoer.
The statistics are sobering. According to Parks Canada Mountain Safety data, the survival rate drops to just 50% for someone buried for 30 minutes. This is why avoidance is the only strategy. Before any trip into the mountains, checking the public avalanche forecast is non-negotiable. In Canada, the primary resource is Avalanche Canada. Learning to read their daily bulletins is an essential skill.
For beginners, the most important tool is the Avalanche Terrain Exposure Scale (ATES). Trails are rated as Simple (Class 1), Challenging (Class 2), or Complex (Class 3). Until you have taken an Avalanche Skills Training (AST 1) course, you must stick exclusively to Simple (Class 1) terrain, especially when the danger rating is Considerable or higher.
Action Plan: Reading an Avalanche Canada Forecast
- Visit avalanche.ca before every backcountry trip to check the forecast for your specific region.
- Identify the danger rating (Low, Moderate, Considerable, High, Extreme) for the Alpine, Treeline, and Below Treeline elevations.
- Read the description of the current ‘avalanche problems’ to understand what type of avalanches are likely and where.
- Review recent avalanche activity and weather data to see how the snowpack is trending.
- Cross-reference your planned route with an ATES map and choose trails rated ‘Simple’ (Class 1) if you are a beginner.
Embracing winter as a non-skier is a journey that builds confidence with every step. By layering properly, respecting the trails, choosing the right gear, and prioritizing safety, you unlock a world of quiet beauty. Start with simple, local trails and gradually expand your horizons as your skills and ‘winter literacy’ grow.