The secret to an epic Powder Highway road trip isn’t a map, but a series of smart strategic trade-offs to maximize your time on the snow.
- Your ski pass choice (Epic vs. Ikon) fundamentally dictates your route and which resorts you can cluster together.
- Vehicle choice is about more than comfort; it’s a critical safety decision for surviving Rogers Pass and deep Kootenay conditions.
Recommendation: Instead of trying to hit all eight resorts, focus on a “resort cluster” that matches your pass and minimizes your pavement time.
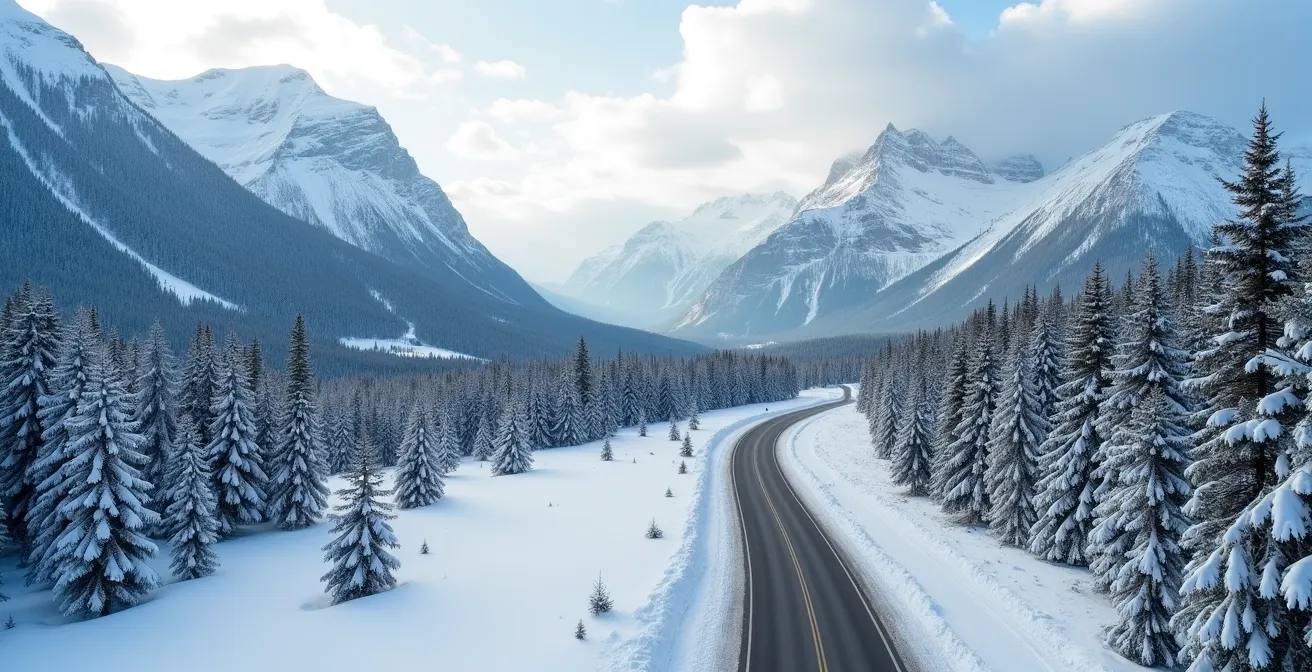
Every hardcore skier has the dream. You see the map of southeastern British Columbia, a legendary loop of tarmac connecting eight of the most pow-choked resorts on the planet, and you start scheming. The Powder Highway. It’s more than a road trip; it’s a pilgrimage. Two weeks, a reliable rig, and a forecast calling for nothing but cold smoke. But turning that dream into a reality is where most people get bogged down. They see a list of resorts and start trying to connect the dots in a straight line.
Most guides will give you the basic stats for each mountain, maybe some generic advice about winter driving. They treat the trip like a checklist to be completed. But this approach misses the entire point. It leads to logistical nightmares, brutal drives after exhausting ski days, and the crushing realization that you spent more time staring at pavement than shredding untouched powder. The truth is, you can’t just “do” the Powder Highway; you have to outsmart it.
This guide is different. It’s built on an insider’s understanding that the perfect trip is a game of strategic trade-offs. It’s not about which resort is “best,” but which pass is best for *your* plan. It’s not about just having winter tires, but understanding the specific demands of Rogers Pass in January. It’s about choosing a home base that matches your post-ski vibe, whether that’s a rowdy pub or a quiet craft brewery.
We’re going to break down the critical decisions you need to make *before* you even pack your skis. We’ll dive into the math of ski passes, the mechanics of mountain-ready vehicles, and the soul of the Kootenay’s best ski towns. Forget the checklist. It’s time to build a smart, logistical plan that maximizes your powder-to-pavement ratio and delivers the trip of a lifetime.
This article provides a strategic framework for planning your ultimate Powder Highway adventure. Below is a summary of the key logistical decisions we will explore to help you craft the perfect itinerary.
Summary: A Strategic Guide to Conquering the Powder Highway
- Epic Pass vs. Ikon Pass: Which Saves More Money on the Powder Highway?
- AWD vs. 4WD: What You Need to Survive Rogers Pass in January
- Ainsworth Hot Springs: The Best Detour for Sore Legs
- Nelson or Rossland: Which Town Has the Best Post-Ski Vibe?
- Why You Need Clear Goggles for Kicking Horse’s Flat Light
- How to Handle Sudden Snowstorms on the Parkway in September
- Domestic Flights vs. Rental Cars: Calculating the Real Cost of Crossing Canada
- Skiing on a Budget: How to Afford a Family Trip to Mont-Tremblant
Epic Pass vs. Ikon Pass: Which Saves More Money on the Powder Highway?
This is the first and most important strategic decision you’ll make. Your pass choice dictates your route, plain and simple. Choosing a pass isn’t about which one is “better” overall; it’s about which pass aligns with the specific cluster of resorts you want to prioritize. The Powder Highway is uniquely split between the two mega-passes, forcing you to make a choice or pay exorbitant window rates. Committing to one pass means you’re committing to a specific zone of the Kootenays.
The Ikon Pass grants you access to the western and northern parts of the loop, including the big-mountain meccas of Revelstoke and RED Mountain, along with Panorama. The Epic Pass, on the other hand, covers the eastern cluster: Fernie, Kicking Horse, and Kimberley. You immediately see the trade-off. Do you want the deep, steep trees of Revy and RED, or the legendary powder and challenging terrain of Fernie and Kicking Horse? According to current pricing data, the full Ikon Pass for the 2024/2025 season comes in around $1,840 CAD, while the Epic Pass offers a different value proposition. There is no pass that covers them all, so your trip planning starts right here.
The table below breaks down the access rules for the key Powder Highway resorts. Notice the 7-day limits, which are crucial for a two-week trip. If you plan to spend more than a week at a single Ikon resort, you’ll need to factor in additional costs.
| Pass Feature | Epic Pass | Ikon Pass |
|---|---|---|
| 2024/25 Price (CAD) | $1,385 | $1,840 (Full) / $1,310 (Base) |
| BC Powder Highway Access | 7 total days at Fernie, Kicking Horse, Kimberley | 7 days each at Revelstoke, RED Mountain, Panorama |
| Unlimited BC Access | Whistler Blackcomb only | None on Powder Highway |
| Blackout Dates | None on full pass | Base pass has holiday restrictions |
Action Plan: Choosing Your Pass
- Resort Itinerary: List all the Powder Highway resorts you absolutely must ski and your ideal number of days at each.
- Data Collection: Tally up the total days for Ikon-affiliated mountains (Revelstoke, RED, Panorama) and Epic-affiliated mountains (Fernie, Kicking Horse, Kimberley).
- Coherence Check: Compare your ideal itinerary to the pass rules. Does the 7-day limit on Epic or Ikon passes affect your plan? Do any Canadian holiday blackout dates on the Ikon Base Pass conflict with your travel dates?
- Priority Assessment: Identify your non-negotiable “hero” resort. If it’s Revelstoke, the Ikon Pass is your starting point. If it’s Fernie, you lean Epic.
- Financial Integration: Calculate the total cost. If your trip is short or focused on 2-3 resorts, compare the pass price to buying a multi-day pass like the Lake Louise Plus Card or just paying the window rate.
AWD vs. 4WD: What You Need to Survive Rogers Pass in January
Your vehicle is not just transportation; it’s your lifeline. Nowhere is this truer than on Rogers Pass, the infamous stretch of the Trans-Canada Highway between Revelstoke and Golden. With an average of 14 metres of annual snowfall and 135 avalanche paths along a 40km section, this is not the place to find out your rental car is unprepared. The debate between All-Wheel Drive (AWD) and 4-Wheel Drive (4WD) is secondary to the one thing that truly matters: your tires.
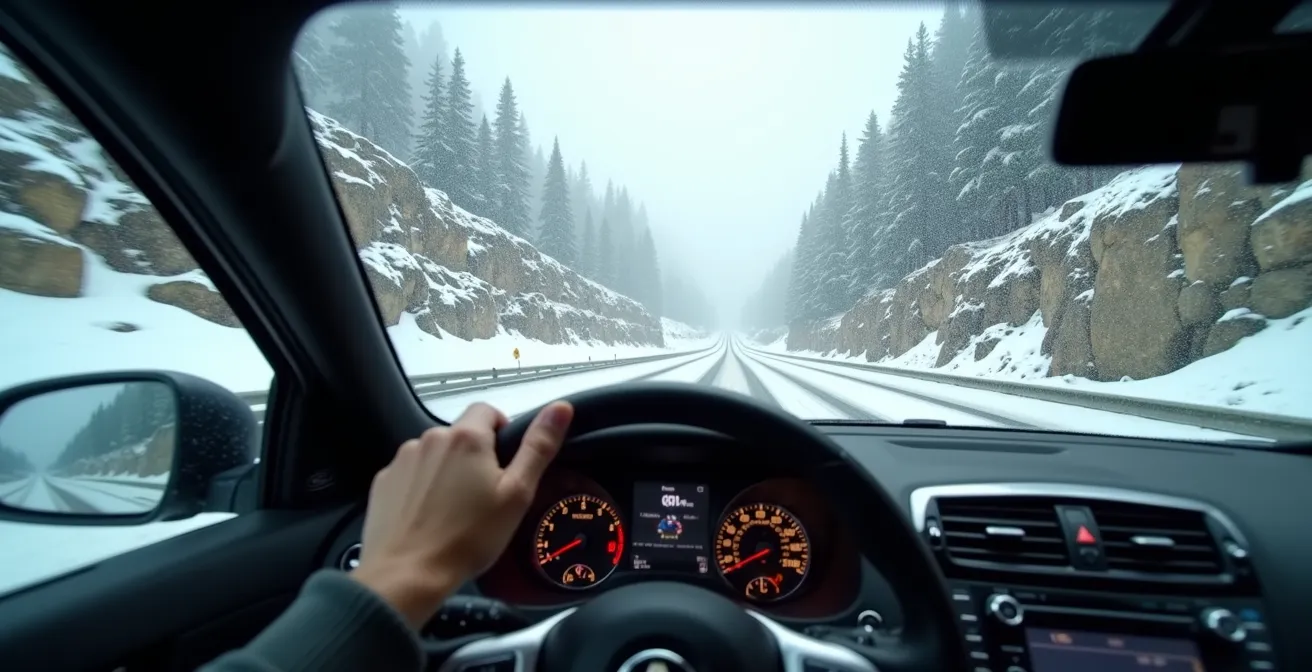
Let’s be crystal clear: AWD or 4WD without proper winter tires is dangerously useless. Parks Canada mandates that all vehicles must have 3-Peak Mountain Snowflake (3PMSF) or M+S tires between October 1 and March 31. There are no exemptions, and the fine is $121. The 3PMSF-rated tires are the gold standard, engineered for severe snow conditions. They must have a minimum tread depth of 3.5mm. Police and park wardens actively check, especially during storm cycles. Don’t be the person in an all-season-equipped SUV causing a highway closure.
So, which system is better? A modern AWD system (like Subaru’s Symmetrical AWD or Audi’s Quattro) is fantastic for maintaining traction and stability on snowy, plowed highways. It’s always on and seamlessly distributes power. True 4WD, found in trucks and larger SUVs, offers high and low-range gearing. 4WD-Low is your trump card for getting unstuck from a deep snowbank or navigating an unplowed side road to a trailhead, but it’s not meant for driving at speed. For 99% of your time on the main highways, a good AWD system with excellent winter tires is the perfect tool. The key is the driver: be prepared for sudden closures due to avalanche control and always have an emergency kit with blankets, food, and water.
Ainsworth Hot Springs: The Best Detour for Sore Legs
After a few days of bell-to-bell skiing and charging through Kootenay powder, your legs will be screaming. While a hot tub at the hotel is good, a strategic mid-trip detour to Ainsworth Hot Springs is a pro-level recovery move. This isn’t just a pool; it’s a unique natural spa featuring a horseshoe-shaped cave filled with mineral-rich, 42°C water. Wading through the steamy, dimly lit tunnels is an otherworldly experience that melts away muscle soreness like nothing else.
The logistics are surprisingly easy. The resort is strategically located just 40 minutes from Nelson and 15 minutes from the charming village of Kaslo. This makes it a perfect half-day trip or an overnight stop when transitioning between Whitewater (near Nelson) and resorts further north like Panorama or Kicking Horse. The key to accessing it from the Nelson area is the Kootenay Lake Ferry, a mandatory and memorable part of the journey. This isn’t some small charter; it’s a major vessel and a vital transport link.
Navigating the ferry is simple if you plan ahead. It’s a free service—in fact, it’s the longest free ferry ride in Canada—but it operates on a fixed schedule. Don’t just show up and expect to drive on. Here are the key things to know:
- Check the Schedule: The ferry has distinct winter and summer schedules. The winter schedule typically runs from mid-September to mid-June. The first sailing from Balfour (the west side, near Nelson) is usually around 6:30 am and the last is around 9:40 pm.
- Allow for Crossing Time: The crossing itself takes about 35 minutes, but you should budget extra time for loading and unloading.
- Monitor Conditions: Like any mountain travel, service can be disrupted by severe weather or mechanical issues. Always check the official Kootenay Lake Ferry schedule and DriveBC for any service advisories before you go.
Nelson or Rossland: Which Town Has the Best Post-Ski Vibe?
Your choice of a home base on the Powder Highway defines your experience off the mountain. Two towns stand out as the primary contenders for the title of “best ski town”: Nelson and Rossland. This isn’t a simple comparison; it’s a fundamental vibe check. Each town offers a wildly different atmosphere, and the right choice depends entirely on what you’re looking for when the lifts stop spinning.
Nelson is the undisputed cultural capital of the Kootenays. Serving Whitewater Ski Resort (a 20-minute drive), it’s a vibrant, bustling small city with a beautifully preserved downtown along Baker Street. It’s often recognized as North America’s best ski town, not just for the skiing but for the culture. The town is packed with art galleries, independent coffee shops, a huge variety of restaurants, and a lively pub scene. Nelson is also the epicenter of the region’s cat and heli-skiing operations. If you want options, energy, and plenty to do on a down day, Nelson is your spot. It feels like a fully-fledged community that just happens to have a world-class ski hill in its backyard.
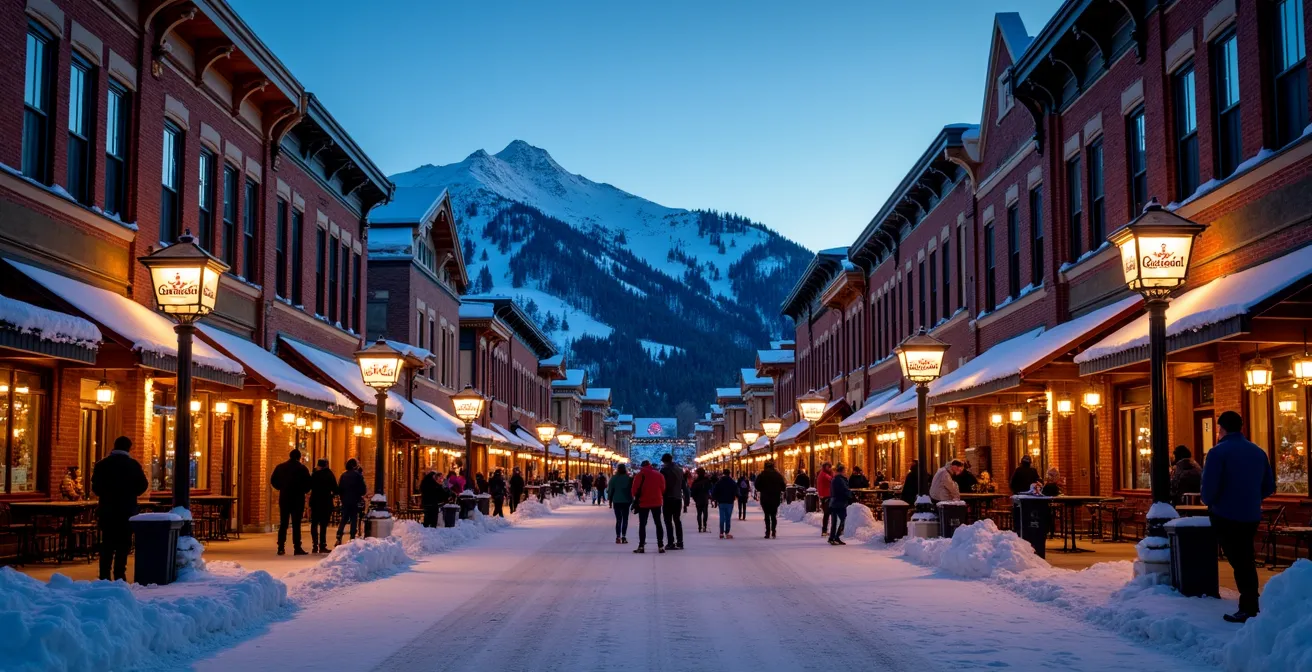
Rossland, on the other hand, is the quintessential pure ski town. It’s smaller, grittier, and exists for one reason: RED Mountain Resort, which is located right on its doorstep. The vibe here is all about the skiing. The main street is shorter, the options are fewer, but the passion for skiing is palpable. The conversations you overhear at the Flying Steamshovel, the town’s legendary pub, are about secret stashes and the day’s best runs. Rossland is for the purist who wants to ski hard, grab a pint with fellow die-hards, and do it all again the next day. It’s less about downtown strolling and more about proximity to the chairlift.
Why You Need Clear Goggles for Kicking Horse’s Flat Light
Gear selection on the Powder Highway goes beyond just having the right skis. At certain resorts, a specific piece of equipment can make or break your day. Case in point: Kicking Horse Mountain Resort and its notorious flat light. When the clouds roll in over Golden, the sheer scale and complexity of the terrain can disappear into a disorienting sea of white. With the fourth-highest vertical drop in North America at 1,315 metres, you don’t want to be guessing where the next roll-over or cliff band is.
This is where your goggle lens choice becomes critical. Your dark, sunny-day iridium lens is completely useless here. In flat light or full-on whiteout conditions, you need a lens that enhances contrast and definition. This means packing a dedicated low-light lens. The best colors are typically rose, yellow, or persimmon. These tints filter out blue light and help your eyes perceive depth and texture in the snow, turning a terrifying, blind descent into a manageable and fun run. Trying to navigate Kicking Horse’s legendary alpine bowls—Crystal Bowl, Bowl Over, or Feuz Bowl—without the right lens is a recipe for disaster.
Many skiers make the mistake of only bringing one goggle or thinking they’ll swap lenses on the chairlift. From an insider’s perspective, this is a rookie move. Fumbling with a delicate lens with frozen fingers in a blowing wind is a great way to scratch it or drop it. The pro tip is to carry two separate pairs of goggles: one for sunny conditions and one dedicated low-light pair. When the light goes flat, you simply swap the entire goggle. It’s faster, safer, and ensures you always have the right tool for the job. If you get caught out, there are local shops in Golden like Selkirk Sports that can save your trip with an emergency lens purchase.
Key Takeaways
- Your ski pass is your route planner; choose Epic for the eastern resorts (Fernie, Kicking Horse) and Ikon for the western ones (Revelstoke, RED).
- Proper 3-Peak Mountain Snowflake winter tires are legally required and far more important than AWD vs. 4WD on Rogers Pass.
- Plan for recovery by scheduling a mid-trip detour to Ainsworth Hot Springs, and factor in the Kootenay Lake Ferry schedule.
How to Handle Sudden Snowstorms on the Parkway in September
Now, a lesson from a different road: the Icefields Parkway. It might seem odd to talk about a September storm on a road trip planned for the depths of winter, but there’s a critical strategic lesson here. Every year, tourists driving the famous route between Jasper and Banff in late summer are caught completely off guard by sudden, intense snowstorms. One minute they’re in a t-shirt taking photos of a glacier, the next they’re in a whiteout with no cell service, driving a rental car with all-season tires. They were unprepared because they judged the conditions based on the calendar, not the environment.
This is the exact same mental trap that can endanger you on the Powder Highway in January. You might check the forecast in Nelson and see clear skies, then start driving towards Revelstoke only to hit a localized lake-effect snow squall near Shelter Bay that dumps 20cm in an hour. Mountain weather is fickle, hyper-localized, and utterly disrespectful of forecasts made 100km away. Respect the terrain, not the calendar or the forecast for a town miles away.
The lesson from the September Parkway storm is about mindset and preparation. It teaches you to anticipate the worst-case scenario. For your Powder Highway trip, this means:
- Your vehicle must be prepared for a blizzard at all times, even if the sun is shining when you leave.
- You must have a physical map because you cannot rely on cell service in remote passes.
- You must have an emergency kit with extra food, water, and warm layers, assuming you might get stuck for several hours.
This isn’t about being paranoid; it’s about being a professional mountain traveler. The mountains set the rules, and a sudden storm is their way of reminding you who’s in charge.
Domestic Flights vs. Rental Cars: Calculating the Real Cost of Crossing Canada
For many hardcore skiers living in Eastern or Central Canada, the first logistical hurdle isn’t the Powder Highway itself—it’s getting there. The question of whether to fly or drive across the country is a major strategic trade-off with significant implications for your budget, timeline, and gear.
The two primary airport gateways to the Powder Highway are Calgary International Airport (YYC) and Kelowna International Airport (YLW). Calgary is the ideal entry point for the eastern loop, putting you just a few hours’ drive from Fernie or Kicking Horse. Kelowna is better positioned for the western side, with a direct route to Revelstoke. Flying allows you to maximize your vacation time, turning a multi-day cross-country slog into a half-day of travel. However, the costs add up quickly: round-trip flights, baggage fees for ski and boot bags (often oversized), and then the cost of a suitable rental vehicle (an AWD/4WD SUV with winter tires) for two weeks.
The alternative is the epic cross-Canada drive. This option gives you the freedom of using your own, trusted vehicle, packed with all your gear without restriction. It eliminates the high cost of a specialized rental. However, you must factor in the “cost” of time. A drive from Toronto to Calgary can easily take 3-4 days each way. For a two-week vacation, this eats up more than half your time before you even click into your bindings. You also have to account for fuel, accommodation along the way, and the wear and tear on your vehicle. The drive itself is a massive undertaking, especially in winter. For most people with limited vacation days, flying is the only practical option, but it requires careful budgeting for the on-the-ground transportation.
Skiing on a Budget: How to Afford a Family Trip to Mont-Tremblant
To truly understand the unique financial equation of the Powder Highway, it’s useful to contrast it with another classic Canadian ski trip: a family vacation to Mont-Tremblant. The budget strategy for a place like Tremblant is often about finding package deals, ski-in/ski-out condos that can fit a family, and taking advantage of on-resort amenities. It’s a model built around convenience and catering to a broad range of skiers, from beginners to experts. The goal is often to minimize logistical friction within a single, self-contained resort environment.
The Powder Highway is a fundamentally different beast. Budgeting here is not about finding an all-in-one package. It’s an exercise in à la carte optimization for the hardcore skier. Your biggest costs are not a fancy condo but rather gas, the right multi-resort pass, and strategically located (but often no-frills) accommodation. You save money by staying in motels in towns like Golden or Revelstoke rather than a slopeside hotel, allowing you to pour those funds into what matters: lift access and mobility.
Where a Tremblant trip might involve expensive on-mountain lunches, the Powder Highway budgeteer packs a sandwich to maximize time on the hill. Where a family might pay for ski school, the Powder Highway traveler invests that money in a specialized piece of gear, like the right goggles for flat light. The entire financial mindset shifts from paying for convenience to investing in access and performance. Affording a trip to the Powder Highway is about being a savvy, mobile operator—knowing which towns have the best value, cooking your own breakfasts, and understanding that the ultimate luxury isn’t a five-star hotel, but first tracks on a 50cm day.
Frequently Asked Questions About The Powder Highway
What lens colors work best in flat light?
Rose, yellow, or persimmon tints enhance contrast and help define terrain features in whiteout conditions.
Should I swap lenses or carry two goggles?
Carrying two separate goggles is more practical than swapping lenses on cold, windy chairlifts.
Where can I buy goggles locally in Golden?
Selkirk Sports and Higher Ground Sports in Golden carry low-light lenses for emergency purchases.
Stop dreaming and start planning. Grab your calendar, run the numbers on your pass, and book your rig. The Kootenays are waiting to deliver the ski trip of a lifetime, and with these strategic trade-offs in mind, you’re ready to conquer it.